 Save to Pinterest
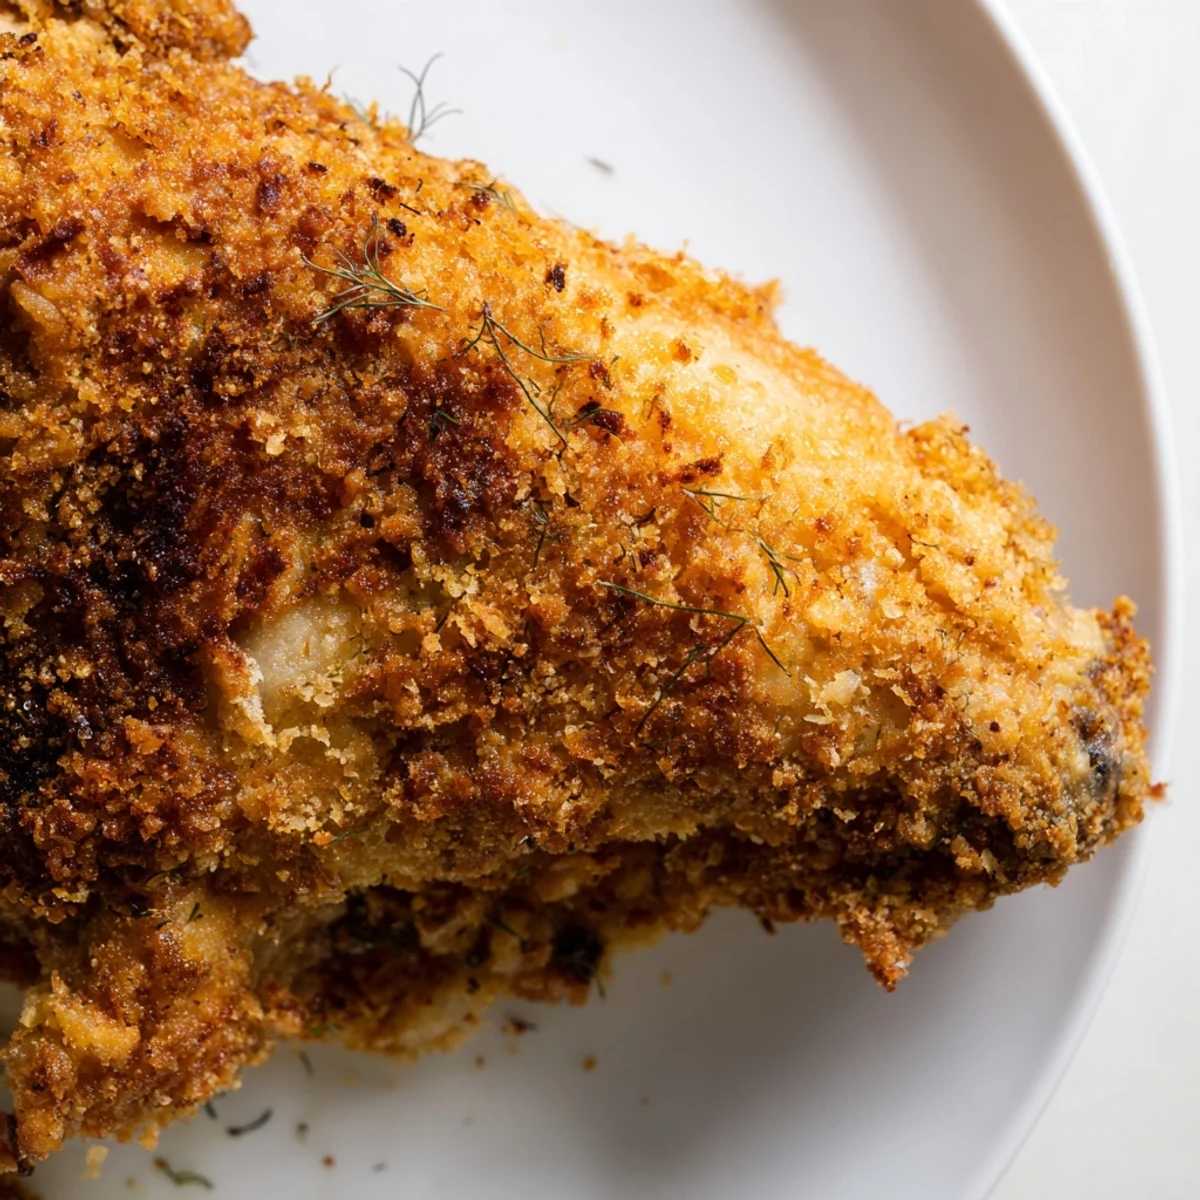
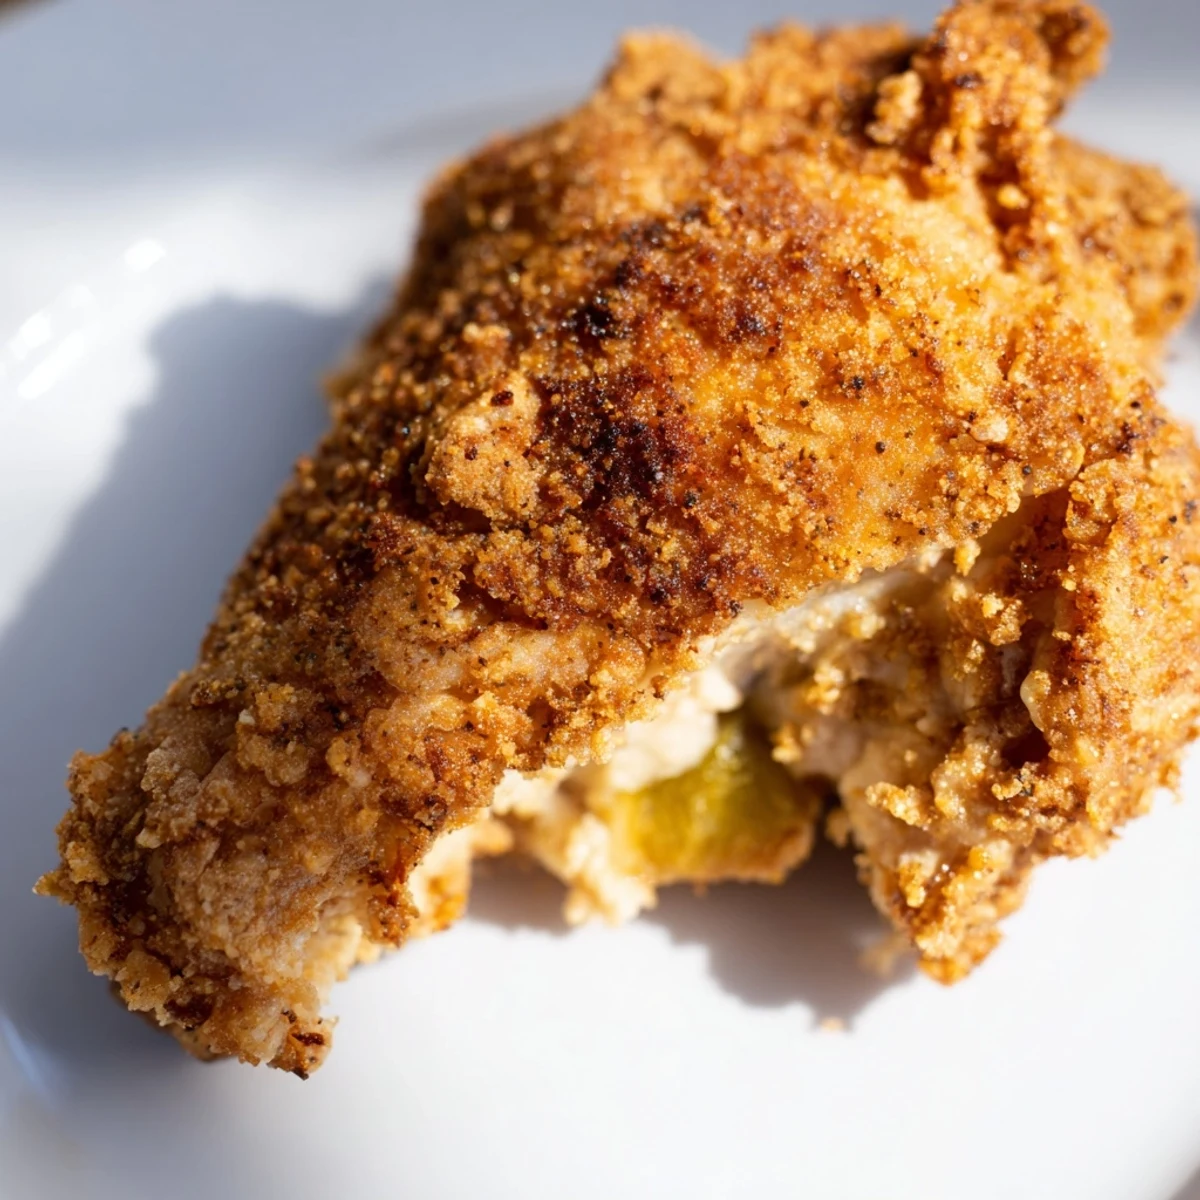
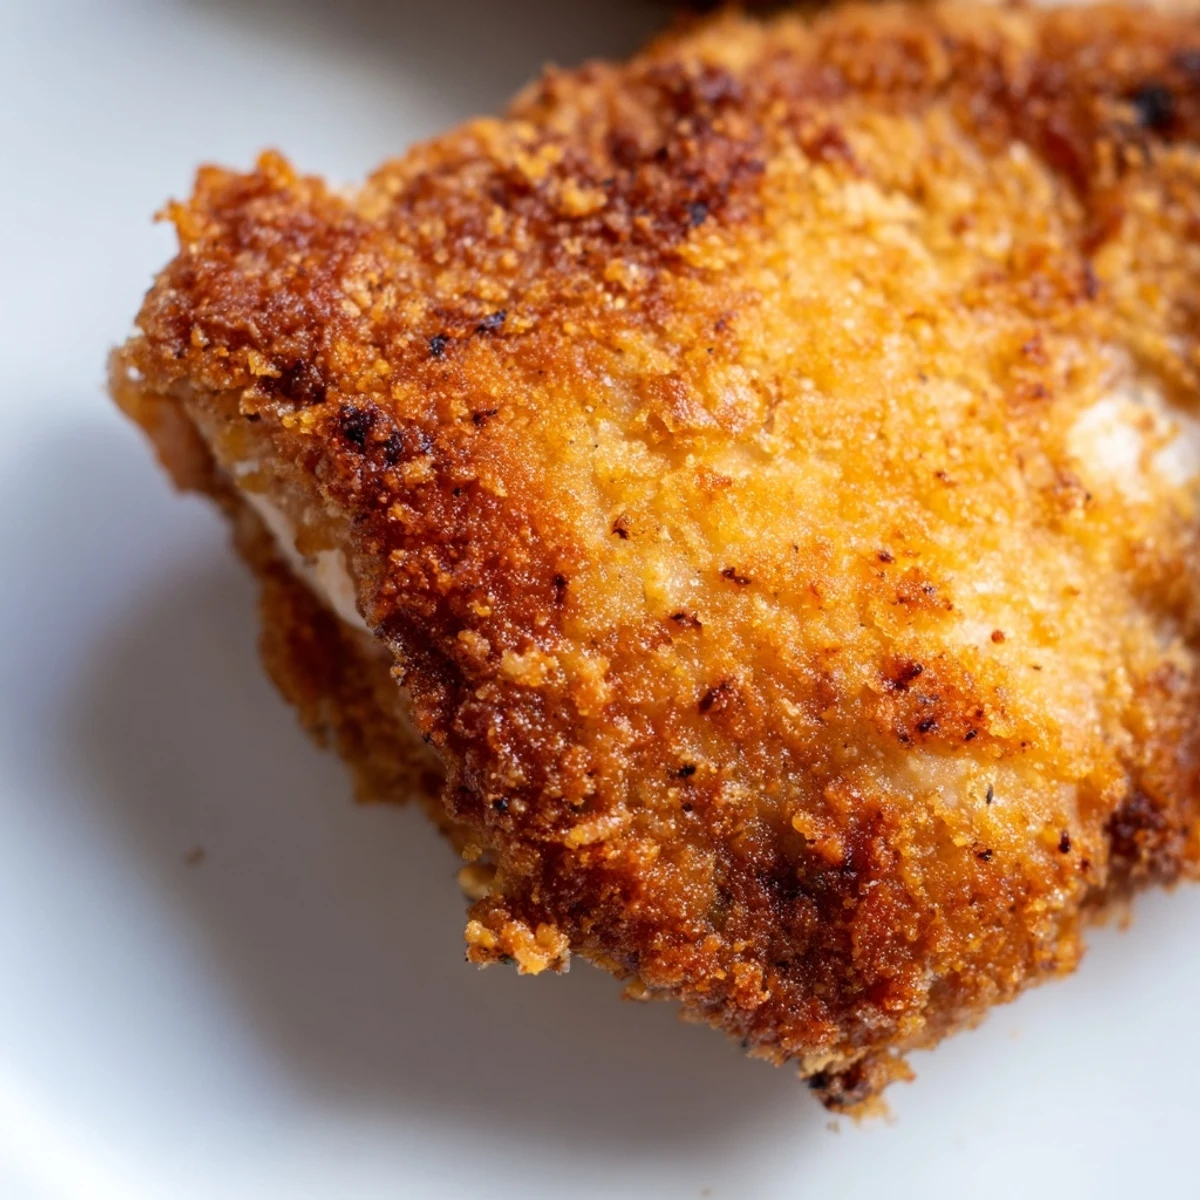
 Succulent chicken pieces soak in tangy dill pickle brine for up to 12 hours, infusing every bite with zesty flavor. After marinating, the chicken gets double-coated in a seasoned flour and panko mixture, creating an extra crispy, golden crust that seals in the juices.
Fry until perfectly cooked through and serve hot with extra pickles on the side. The pickle brine tenderizes the meat while adding a savory tang that pairs beautifully with the crunchy, seasoned breading. Perfect for dinner, this American-style main dish yields four servings and comes together with just 15 minutes of active prep time.
I stumbled onto this combination during a desperate weeknight cooking experiment when I had nothing but pickles and chicken in the fridge. The first bite made my husband actually stop scrolling through his phone and ask what I did differently. Now it is the one dinner my friends specifically request when they come over, and I have started keeping extra pickle juice in the fridge just in case.
Last summer I made this for a backyard cookout and watched my pickle hating sister go back for thirds before realizing what she was eating. The way the dill fragrance fills the kitchen while it fries is honestly one of my favorite smells in home cooking. My kids now fight over who gets to lick the extra pickle spoon.
Ingredients
- Chicken thighs or breasts: Thighs stay juicier but breasts work beautifully if you prefer white meat
- Dill pickle juice: The real star of the show and worth saving whenever you finish a jar
- Chopped dill pickles: Adds little bursts of tangy texture throughout the marinade
- Garlic powder: Rounds out the briny flavors with a savory backbone
- All-purpose flour: Creates the base of that crispy coating we all want
- Panko breadcrumbs: The secret to extra crunch that regular breadcrumbs cannot achieve
- Paprika: Gives the chicken that gorgeous golden color we all associate with perfectly fried food
- Onion powder: Deepens the savory notes without adding any actual onion texture
- Eggs and water: The glue that holds the breading to the chicken
- Vegetable oil: Needs to be about half an inch deep in your pan for that perfect fry
Instructions
- Let the chicken soak in that pickle brine:
- Toss everything in a bag and forget about it for as little as an hour or up to a whole day if you are planning ahead
- Get your breading station ready:
- Mix the flour, panko, and all those spices in one bowl, then whisk the eggs and water in another
- Dry off the chicken pieces:
- This is the messy but crucial step that helps the coating actually stick instead of sliding right off
- Coat each piece twice:
- Flour, egg, then flour again, pressing firmly so every inch gets covered in that crispy goodness
- Heat your oil until it shimmers:
- You want it hot enough that a drop of water sizzles immediately but not smoking
- Fry until golden perfection:
- About five minutes per side, depending on thickness, until you hit that safe internal temperature
- Let them rest on a rack:
- This keeps the bottom from getting soggy while you finish the rest of the batch
 Save to Pinterest
 This recipe became my go to for new neighbors and comfort food deliveries alike. Something about that combination of crunch and tang just makes people feel at home.
Making It Your Own
I once added a tablespoon of hot sauce to the marinade and discovered a whole new level of flavor that my spice loving friends could not stop talking about. The recipe is incredibly forgiving and welcomes whatever spin you want to put on it.
Perfect Sides
Creamy potato salad cuts through the tang perfectly and feels like the most natural pairing imaginable. A crisp cold slaw works just as well and adds that satisfying crunch alongside the chicken.
Make Ahead Magic
The marinade does all the work ahead of time so you can walk in the door and have dinner frying within minutes. I have marinated chicken in the morning before work and come home to dinner practically making itself.
- Freeze the raw marinated chicken for up to a month before breading and frying
- Double the recipe and freeze already cooked pieces for emergency crispy chicken cravings
- The breading mixture can be pre-mixed and stored in an airtight container for future recipes
 Save to Pinterest
 Every time I serve this, someone asks for the recipe and looks genuinely surprised when I tell them how simple it actually is.
Recipe Questions & Answers
- → How long should I marinate the chicken in pickle juice?
-
For best results, marinate the chicken for at least 1 hour, but up to 12 hours in the refrigerator. The longer marinating time allows the dill pickle brine to fully penetrate and tenderize the meat, infusing it with maximum tangy flavor.
- → Can I make this crispy chicken gluten-free?
-
Yes, simply substitute the all-purpose flour with a gluten-free flour blend and use gluten-free panko breadcrumbs. The coating method and cooking time remain exactly the same, resulting in a delicious crispy exterior that everyone can enjoy.
- → What oil works best for frying pickle chicken?
-
Vegetable oil, canola oil, or peanut oil all work excellent for frying this chicken. These neutral oils have high smoke points and won't overpower the dill pickle flavor. Heat the oil to medium-high before adding the breaded chicken pieces.
- → How do I know when the chicken is fully cooked?
-
The chicken is done when it reaches an internal temperature of 165°F (74°C). The exterior should be deep golden brown after frying for 4-6 minutes per side. Use a meat thermometer to check the thickest part of the chicken to ensure it's safely cooked through.
- → What sides pair well with dill pickle chicken?
-
Creamy potato salad, crisp coleslaw, or macaroni salad are classic accompaniments. The tangy chicken also pairs beautifully with roasted vegetables, mashed potatoes, or a simple green salad. A cold pilsner or light lager complements the flavors perfectly.
- → Can I bake this chicken instead of frying?
-
Yes, you can bake at 400°F for 20-25 minutes, flipping halfway through. While baking yields a lighter dish, the crust won't be quite as crispy as the fried version. For best crunch, finish under the broiler for 1-2 minutes.
