 Save to Pinterest
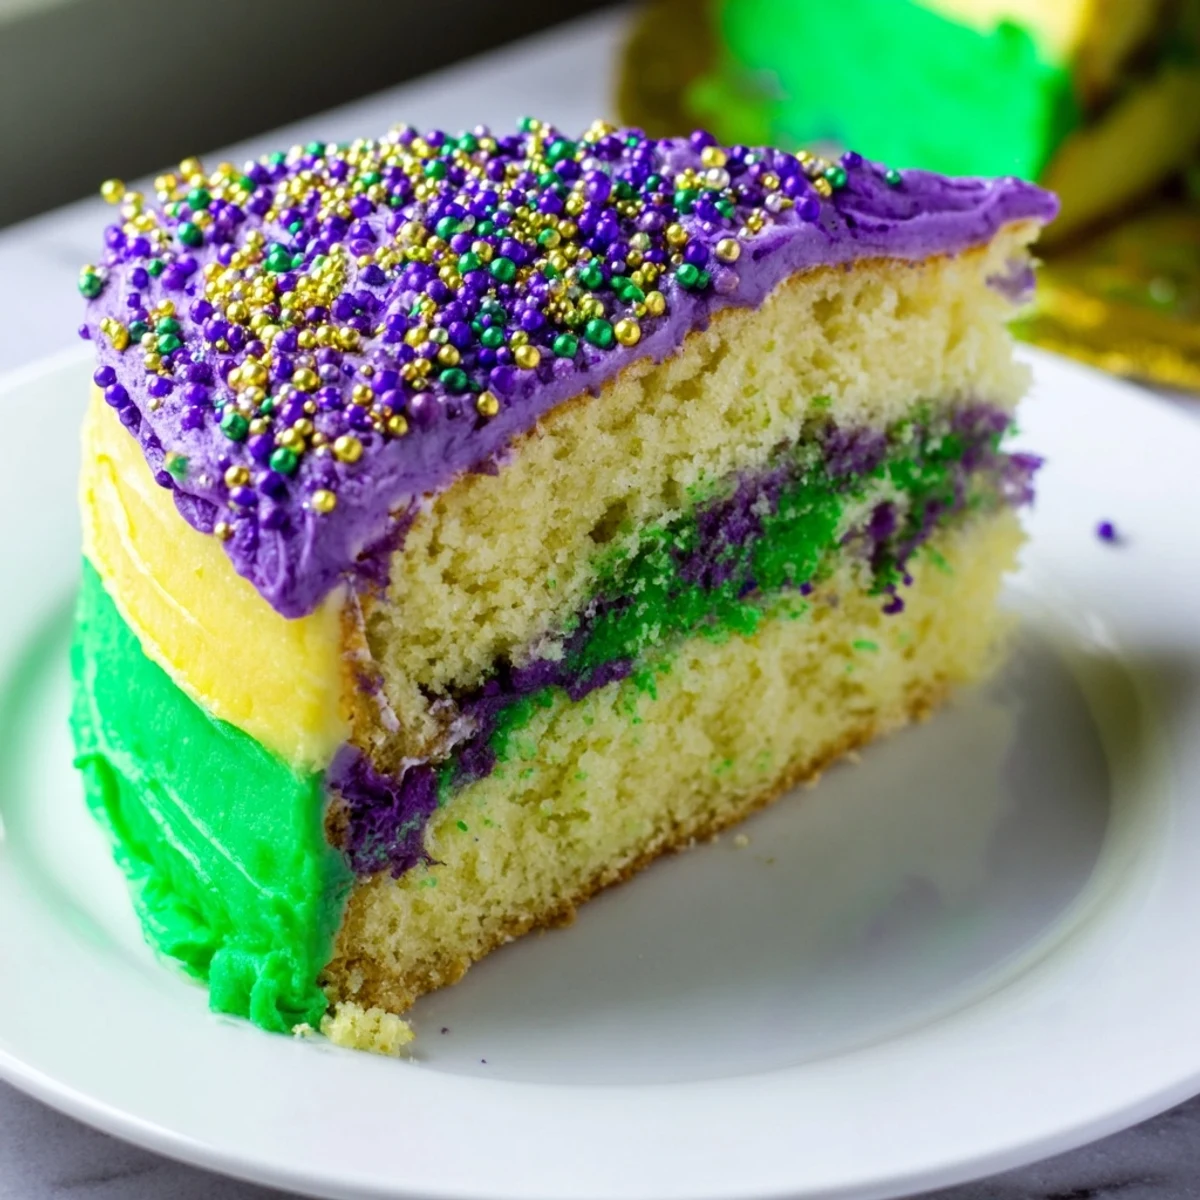
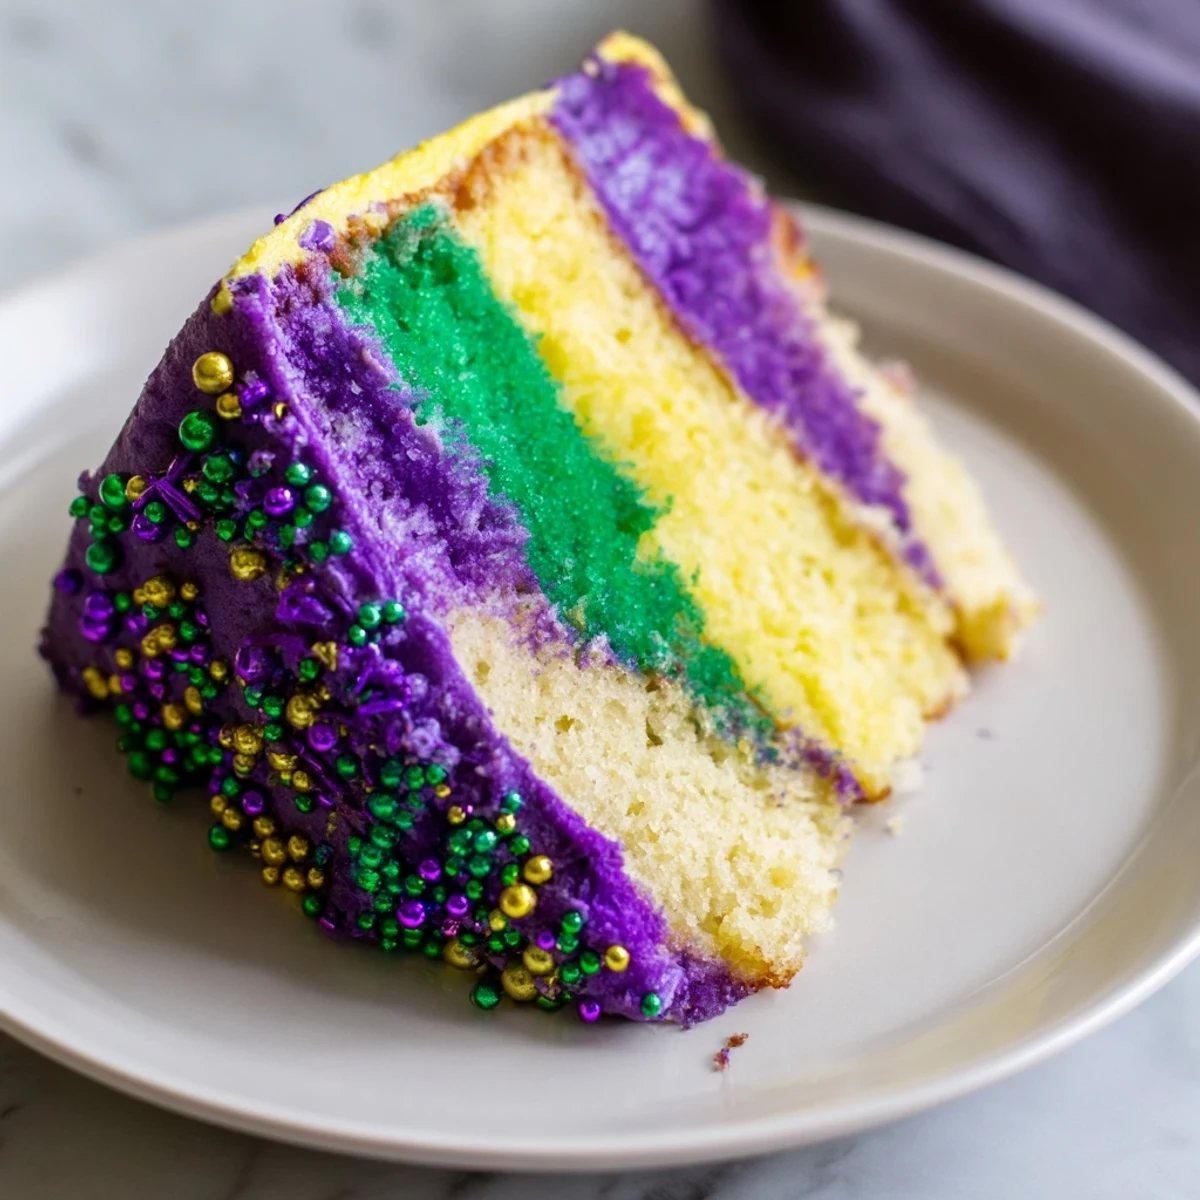
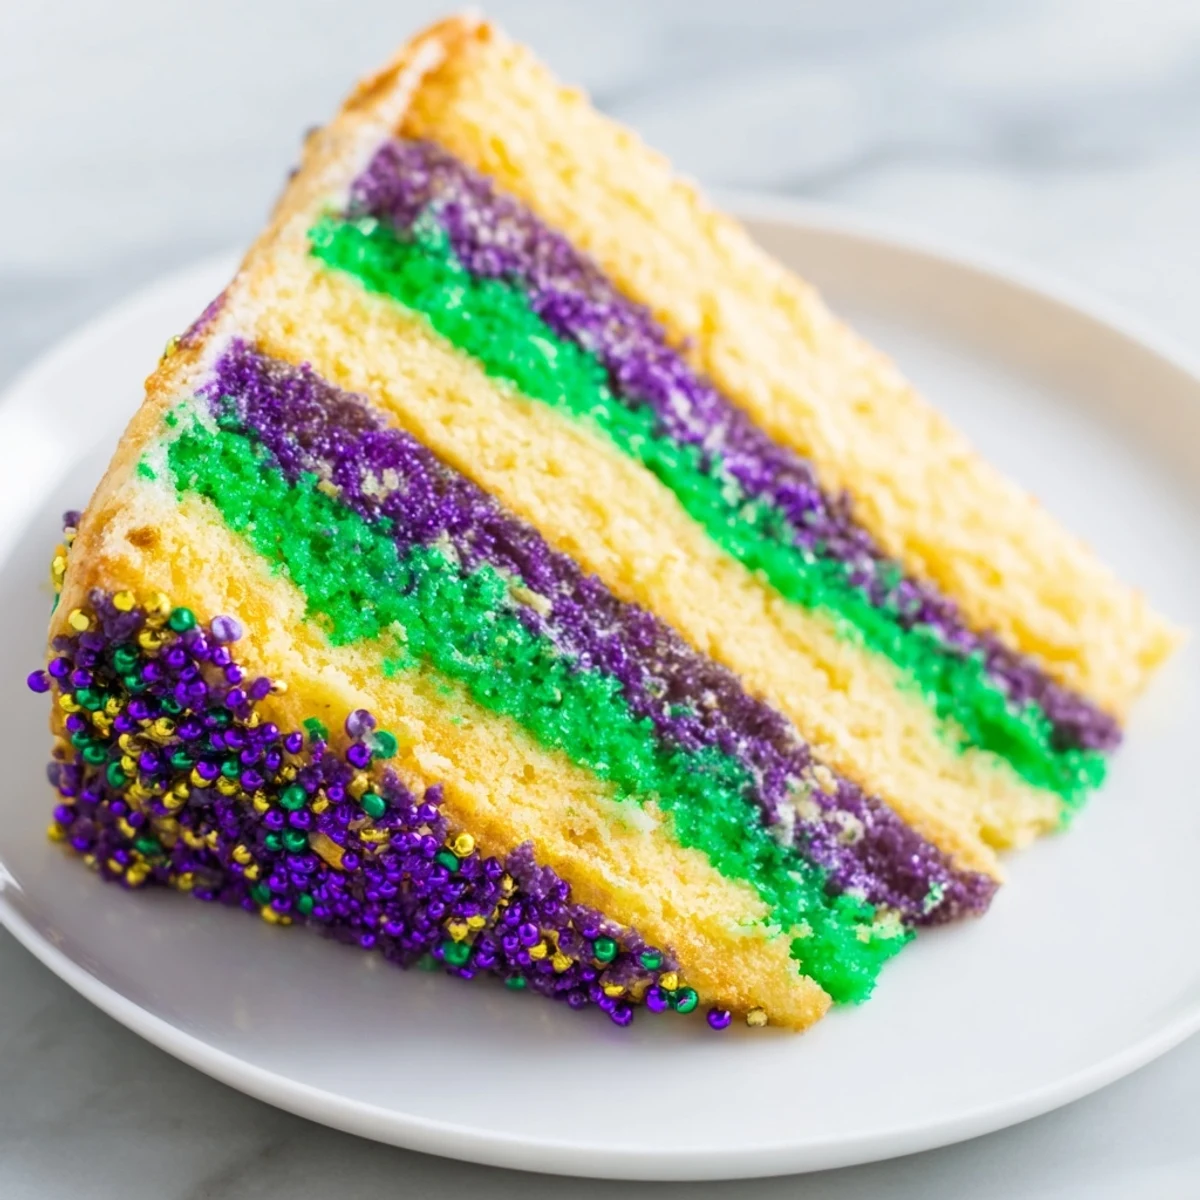
 This moist vanilla cake features layers of vibrant purple, green, and gold icing, inspired by Mardi Gras traditions. The batter combines flour, baking powder, butter, sugar, eggs, vanilla, and milk for a tender crumb. The tricolor icing is created by dividing creamy butter frosting and tinting each portion with vivid gel colors. Assembly highlights alternating layers and decorative stripes, offering a striking presentation with a touch of New Orleans flair. Chill before serving for clean slices and optional festive decor enhances the celebratory feel.
The year I decided to host my first proper Mardi Gras party, I stood in my kitchen surrounded by more food coloring than any reasonable person should own. Something about those three colors swirling together against white frosting felt like pure joy on a plate. My roommate walked in, took one look at the purple stained countertops, and asked if I'd started a small art project in the baking aisle. That cake disappeared faster than anything I've ever made, and now it's not really Fat Tuesday without it.
Last February, my neighbor knocked on my door because she could smell vanilla buttercream from the hallway. She ended up staying for three hours, helping me decide whether the green should be more mint or more forest, and we ate the trimmings straight from the spatula. Some recipes are just better when you have company in the kitchen.
Ingredients
- All-purpose flour: The structure of your cake depends on this, so measure properly either by weight (ideal) or the spoon and level method
- Baking powder: This is what gives your cake its lift, so make sure its not expired or your layers will be disappointingly flat
- Unsalted butter: Room temperature butter is non negotiable here, it needs to be soft enough to leave a fingerprint but not melted or greasy
- Granulated sugar: Cream this thoroughly with the butter, those tiny air pockets are what make the cake tender
- Large eggs: Use room temperature eggs or they'll seize up your butter mixture and create weird little lumps that never quite smooth out
- Vanilla extract: Pure vanilla makes a difference here, and don't be tempted to add more or it'll overpower the delicate crumb
- Whole milk: Full fat milk creates a more tender crumb, though I've used 2% in a pinch without disaster
- Powdered sugar: Sift this first or you'll spend ten minutes trying to mash out lumps that refuse to disappear
- Gel food coloring: Gel is concentrated and won't thin your frosting like liquid colors can, plus the colors are more vibrant and true
Instructions
- Preheat your oven and prepare the pans:
- Preheat your oven to 350°F (175°C) and generously grease two 9-inch (23 cm) cake pans with butter, then dust with flour, tapping out any excess. This creates a nonstick surface that helps your cakes release perfectly every time.
- Whisk the dry ingredients together:
- In a medium bowl, whisk together the flour, baking powder, and salt until well combined, then set this aside. Doing this first ensures the leavening is evenly distributed throughout every bite.
- Cream the butter and sugar:
- In a large bowl, beat the softened butter and granulated sugar on medium-high speed until the mixture is pale and fluffy, about 3 full minutes. This step is crucial for texture, so don't rush it or your cake will be dense.
- Add the eggs and vanilla:
- Add the eggs one at a time, beating well after each addition until fully incorporated before adding the next. Mix in the vanilla extract last.
- Combine wet and dry ingredients:
- Alternately add the flour mixture and milk to the butter mixture, beginning and ending with the flour mixture. Mix until just combined, being careful not to overmix or your cake will be tough.
- Bake the cake layers:
- Divide batter evenly between prepared pans, smooth the tops, and bake for 30 to 35 minutes. A toothpick inserted into the center should come out clean or with just a few moist crumbs.
- Cool completely before frosting:
- Let the cakes cool in pans for 10 minutes, then turn out onto wire racks to cool completely. Warm cake will melt your frosting and create a messy slide-off situation.
- Prepare the buttercream frosting:
- Beat the butter until creamy, then gradually add powdered sugar, milk, vanilla, and salt. Beat until fluffy and spreadable, about 3 to 4 minutes.
- Divide and color the frosting:
- Divide icing into three separate bowls and tint each with purple, green, and yellow gel food coloring. Mix thoroughly until the color is even and vibrant.
- Assemble the cake:
- Place one cake layer on a serving plate and spread a layer of any colored icing on top. Add the second cake layer.
- Frost with tricolor design:
- Frost the top and sides with alternating stripes or sections of the three colored icings, creating that festive Mardi Gras look.
- Add final touches and chill:
- Decorate with colored sugar and optional Mardi Gras decorations. Chill the cake for 30 minutes before serving for cleaner, more professional slices.
 Save to Pinterest
 The first time I made this for my book club, one member actually asked where I ordered it from. When I told her I baked it myself, she demanded the recipe on the spot, and now she makes it every year for her own Mardi Gras gathering. That's the thing about festive baking, it has a way of traveling from kitchen to kitchen like a delicious story.
Getting The Colors Right
I learned the hard way that purple food coloring can turn gray if you don't add enough. Start with a tiny bit and build up, and remember that the colors will deepen slightly as the frosting sits. If you want true Mardi Gras purple, you may need to mix red and blue gel colors until you hit that royal shade.
Making It Ahead
You can bake the cake layers up to two days ahead and wrap them tightly in plastic wrap at room temperature. The frosting can also be made a day ahead and stored in the refrigerator, just let it come to room temperature and give it a quick whip before using.
Serving And Storing
This cake actually tastes better on day two, when the frosting has had time to slightly soften the crumb. Store it covered at room temperature for up to three days, though in my house it never lasts that long.
- Cover the cut edges with plastic wrap to keep the remaining cake fresh
- Bring chilled cake to room temperature 30 minutes before serving for the best texture
- If refrigerating, the buttercream will firm up, which is actually great for neat slices
 Save to Pinterest
 Whether you're celebrating Fat Tuesday or just need a colorful dessert to brighten a gray winter day, this cake brings joy before anyone even takes a bite. Laissez les bons temps rouler.
