 Save to Pinterest
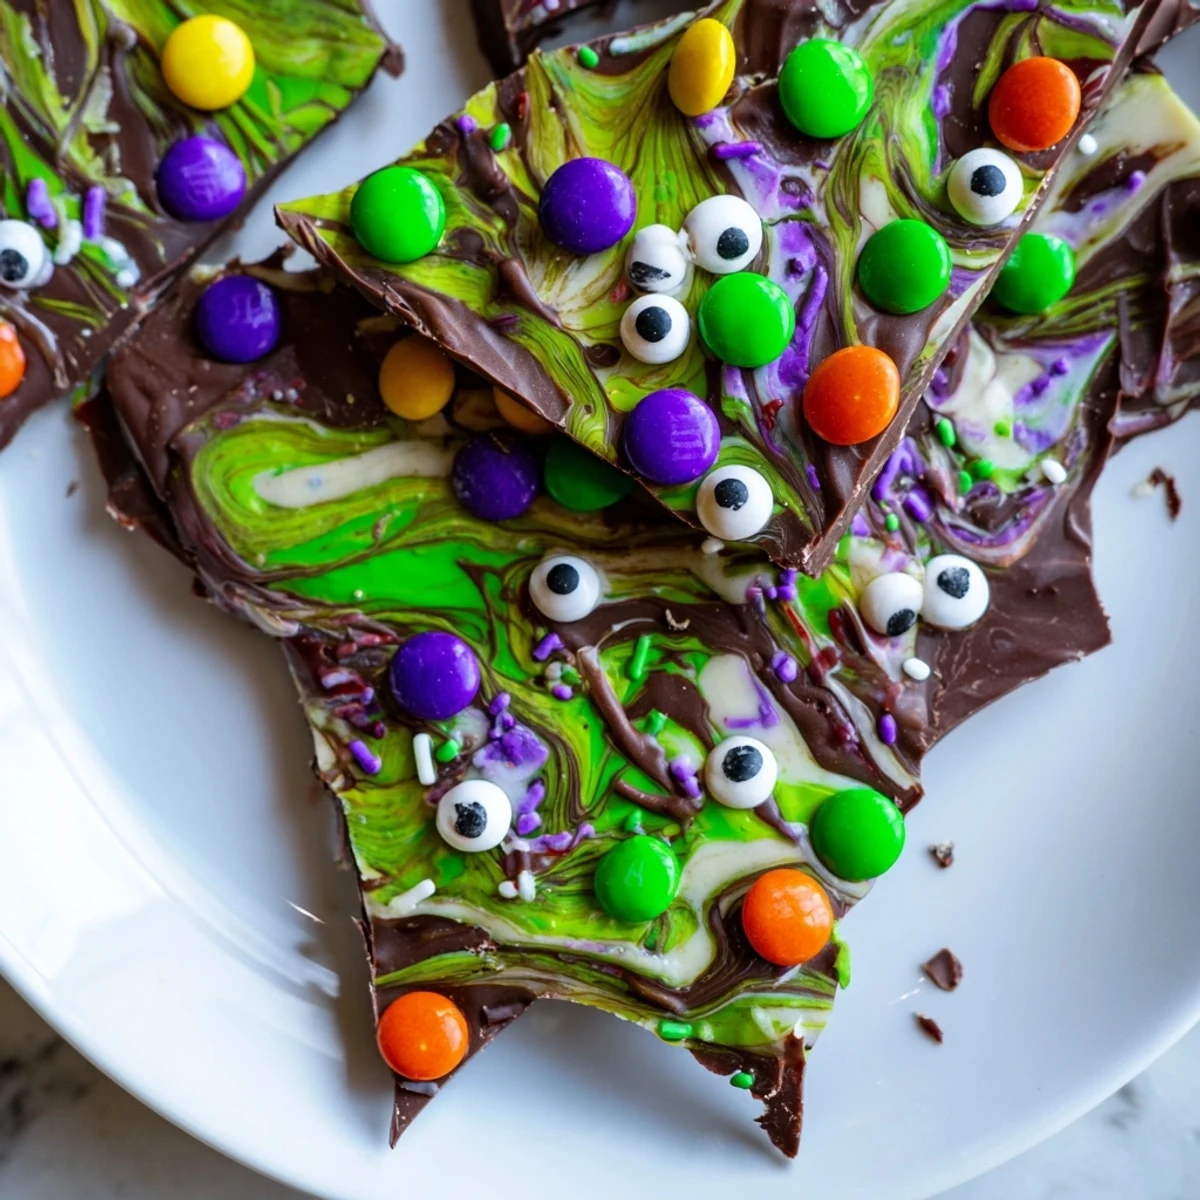
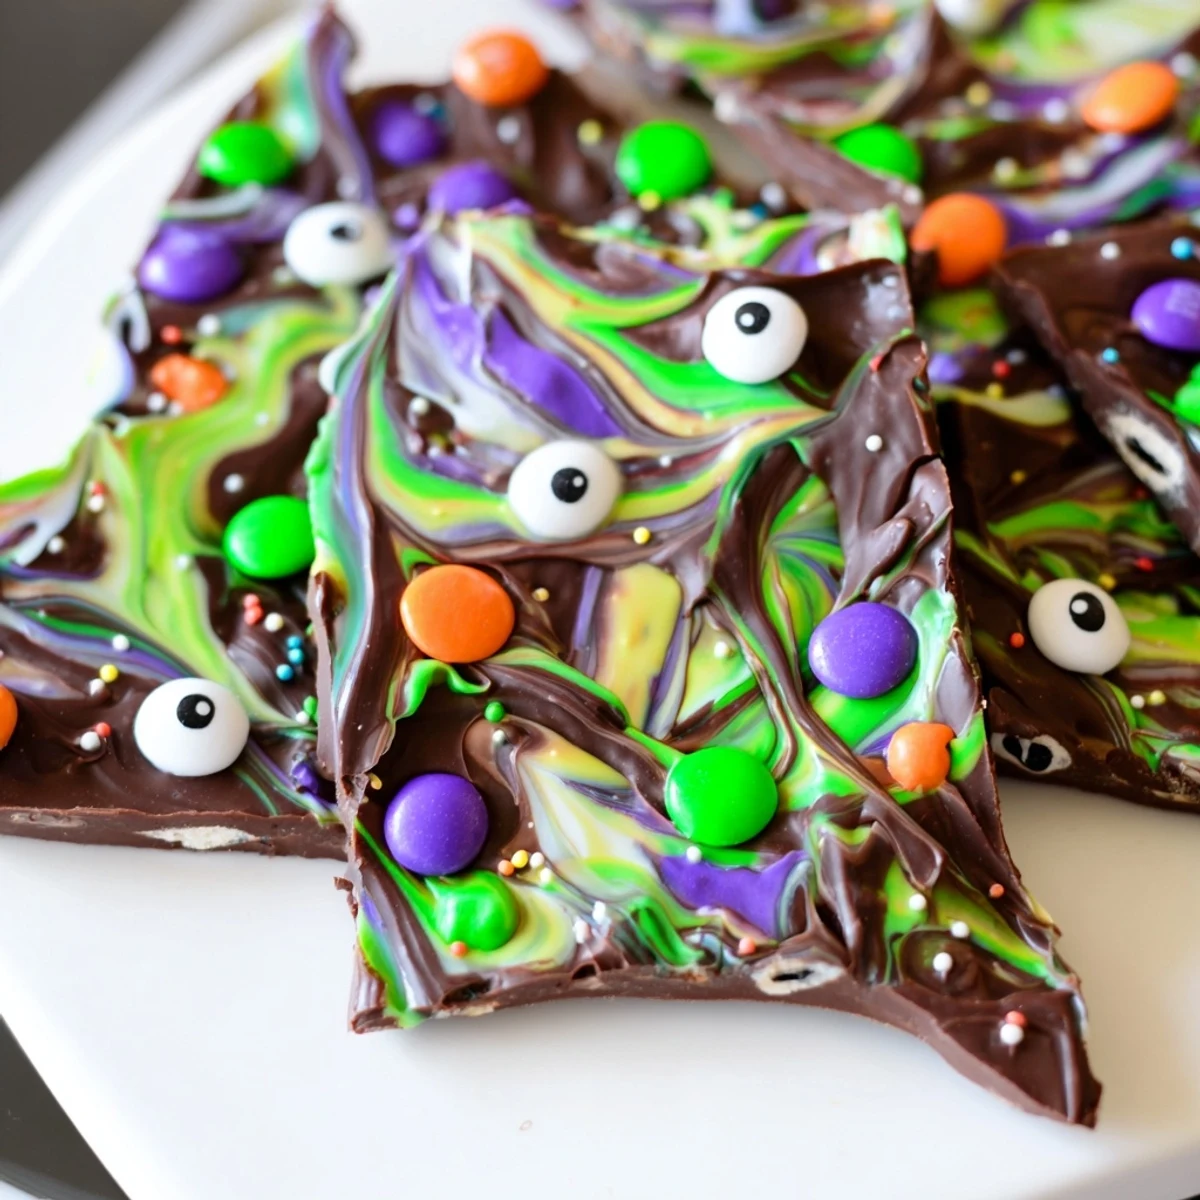
 This festive Halloween treat layers rich semisweet chocolate with creamy white chocolate and vibrant candy melts, swirled together for a mesmerizing marbled effect. Topped with playful candy eyes, sprinkles, and colorful chocolate candies, this bark captures the spooky spirit of the season. The contrasting chocolates create a beautiful dark and light pattern while the candy decorations add delightful crunch and visual appeal.
Perfect for Halloween parties, classroom treats, or gift-giving, this bark comes together quickly with just melting and spreading. The breaking technique creates rustic, irregular pieces that look impressive on any dessert platter. Kids love helping decorate with the candy eyes and sprinkles, making it a fun family activity.
The first time I made this spooky bark, my kitchen looked like a chocolate explosion had happened and I could not stop laughing. Candy eyes were everywhere and I may have eaten more decorations than actually made it onto the bark.
Last Halloween my neighbor's daughter asked if she could help me make witchy treats for the block party. We ended up with chocolate smudges on our faces and the most creative, slightly crooked bark that disappeared faster than anything else on the table.
Ingredients
- Semisweet chocolate chips: The rich, smooth base that holds everything together and balances the sweet white chocolate perfectly
- White chocolate chips: Creates those beautiful ghostly swirls that make the bark look magically marbled
- Colorful candy melts: Pick your favorite Halloween colors or go with orange, green, and purple for that classic witchy vibe
- Mini candy-coated chocolates: Little pops of color and crunch throughout every bite
- Candy eyes: The absolute star of the show that makes this bark come alive and everyone smile
- Halloween sprinkles: Extra sparkle because everything is better with a little glitter
Instructions
- Prep your workspace:
- Line a baking sheet with parchment paper so you can easily remove the bark once it sets. Trust me, this saves so much cleanup later.
- Melt the dark chocolate:
- Pour semisweet chips into a microwave-safe bowl and heat in 30-second bursts, stirring between each. Patience here prevents seizing and keeps it silky smooth.
- Spread the foundation:
- Pour that gorgeous melted chocolate onto your prepared sheet and spread it into an even layer, about a quarter-inch thick.
- Melt the remaining chocolates:
- In separate bowls, zap the white chocolate and colored candy melts in 20-second intervals. Watch them closely since white chocolate can be finicky.
- Create the swirl:
- Drop spoonfuls of the white and colored chocolates randomly over the dark base. Drag a toothpick through them in swirling patterns to make marble-like ribbons.
- Add the magic:
- While everything is still warm and glossy, scatter candy-coated chocolates, candy eyes, and sprinkles across the surface.
- Let it set:
- Leave it at room temperature for about 30 minutes or pop it in the fridge for 10 to 15 minutes until firm.
- Break into pieces:
- Use your hands to snap the bark into irregular, rustic shards. Store in an airtight container and try not to eat it all in one sitting.
 Save to Pinterest
 My sister started making this every year for her classroom Halloween party and the kids talk about it for months. One year a student told her it was the best thing that ever happened to Halloween, which I think is the highest compliment possible.
Making It Your Own
I have experimented with swapping dark chocolate for the semisweet when I want something less sweet. One time I used peanut butter chips instead of white chocolate and it was this incredible salty-sweet situation that I still dream about.
The Swirling Technique
The first few times I made this I over-swirled and ended up with muddy-colored chocolate instead of pretty distinct ribbons. Now I do just three or four passes through the chocolate and stop while it still looks intentional.
Storage And Gifting
This bark makes the most adorable homemade gift when packed in clear bags tied with orange ribbon. I learned the hard way that layering pieces between parchment paper keeps them from sticking together in humid weather.
- Keep it away from direct sunlight or the decorations might start sliding off
- If you are making this for a party, break it into pieces just before serving
- The candy eyes can get a little sticky in very warm rooms
 Save to Pinterest
 There is something so satisfying about breaking chocolate into jagged pieces and watching everyone grab for their favorite shard with the most candy eyes.
Recipe Questions & Answers
- → How far in advance can I make this bark?
-
You can prepare this bark up to 1 week in advance when stored in an airtight container at cool room temperature. This makes it perfect for prepping ahead of Halloween parties or events.
- → Can I use different types of chocolate?
-
Absolutely. While semisweet provides classic flavor, you can substitute milk chocolate for a sweeter taste or dark chocolate for a more intense cocoa profile. The melting instructions remain the same regardless of chocolate type.
- → What if my chocolate seizes while melting?
-
If your chocolate becomes grainy or seizes, try adding a teaspoon of coconut oil or vegetable oil and stirring vigorously. This usually helps restore smoothness. Always melt in short intervals and avoid overheating to prevent seizing.
- → How do I achieve the best marble swirl effect?
-
Work quickly while chocolates are melted. Drop spoonfuls of contrasting colors randomly, then use a toothpick or skewer to drag through the chocolates in S-shapes or circular motions. Don't over-swirl or the colors will muddy together.
- → Is this bark suitable for school classrooms?
-
Check with your school regarding their nut policy first. While the base ingredients are nut-free, some candies may be processed in facilities with nuts. Look for nut-free certified candy brands and always check individual labels if allergies are a concern.
- → Can I freeze this chocolate bark?
-
Yes, you can freeze this bark for up to 3 months. Place pieces in a freezer-safe container with parchment paper between layers. Thaw in the refrigerator to prevent condensation from forming on the chocolate surface.
