 Save to Pinterest
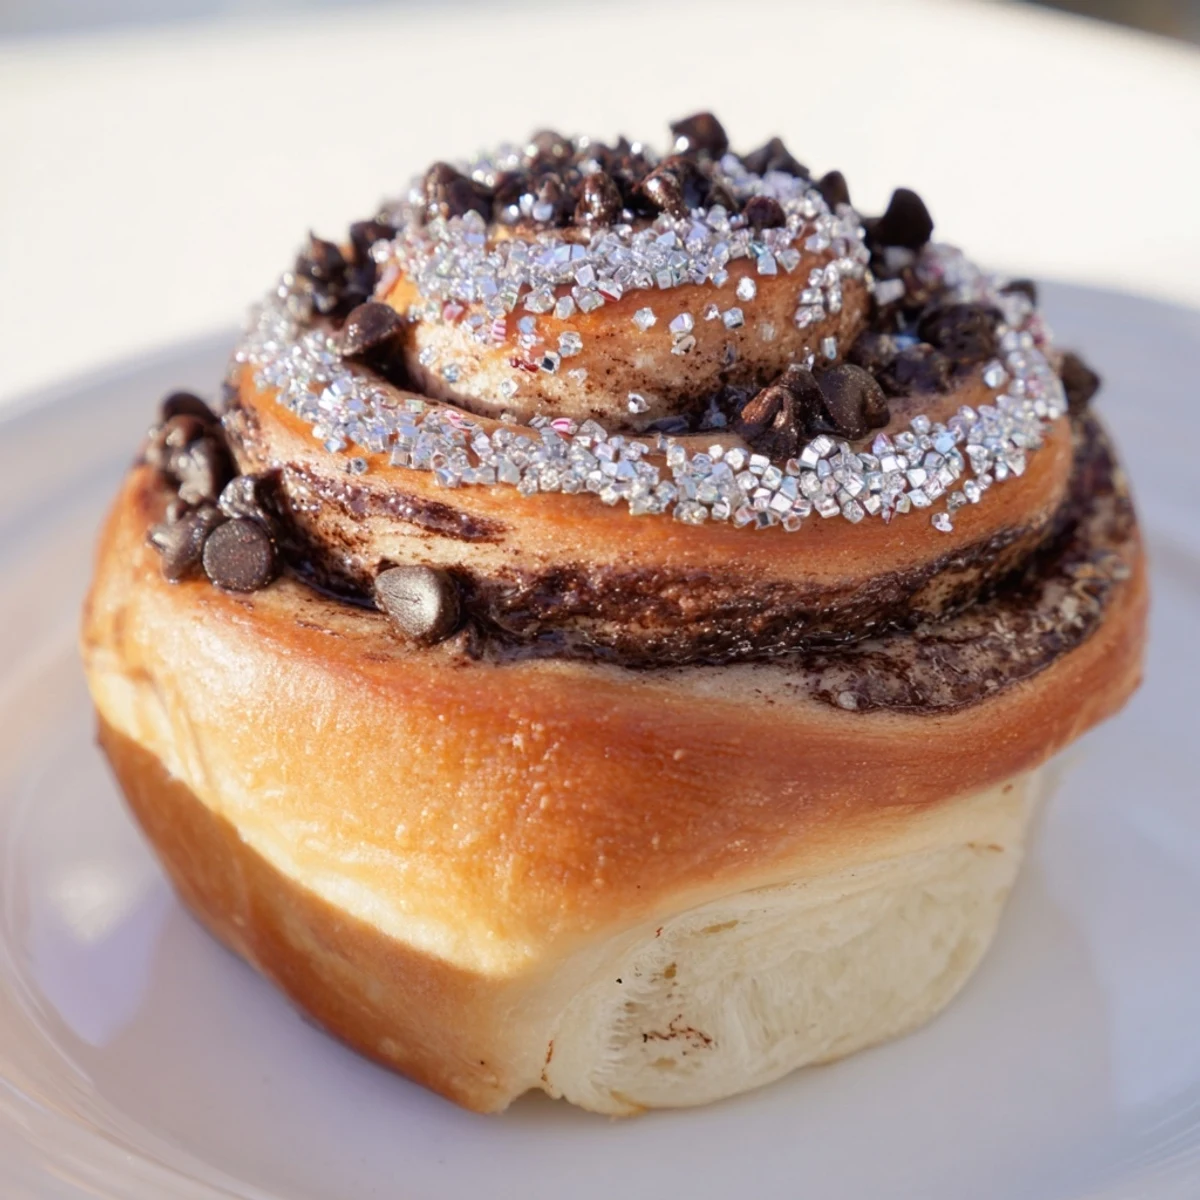
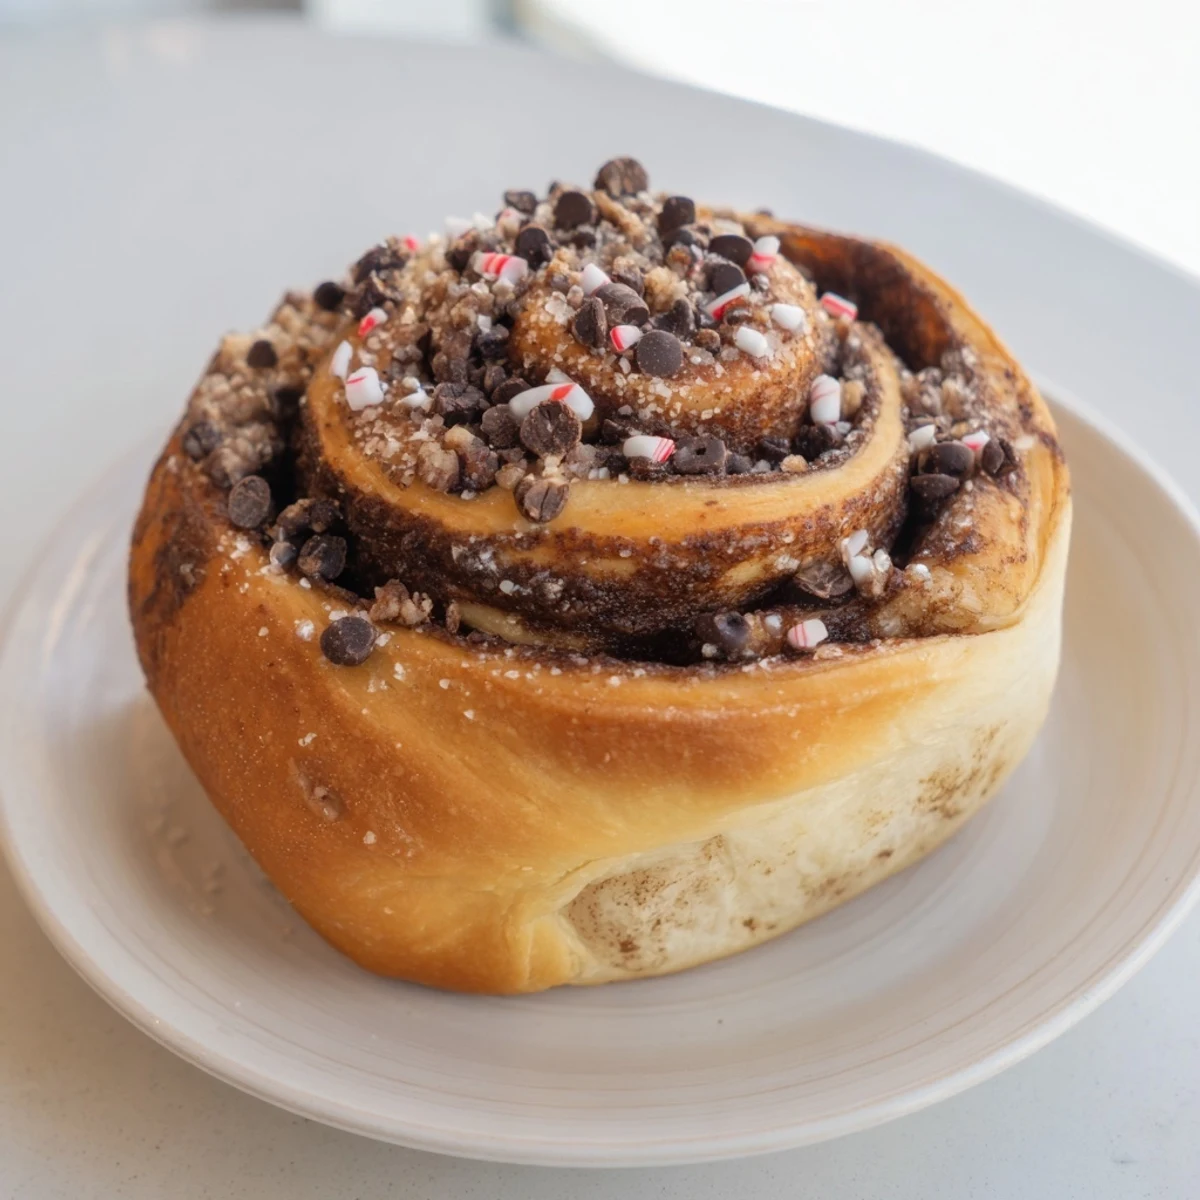
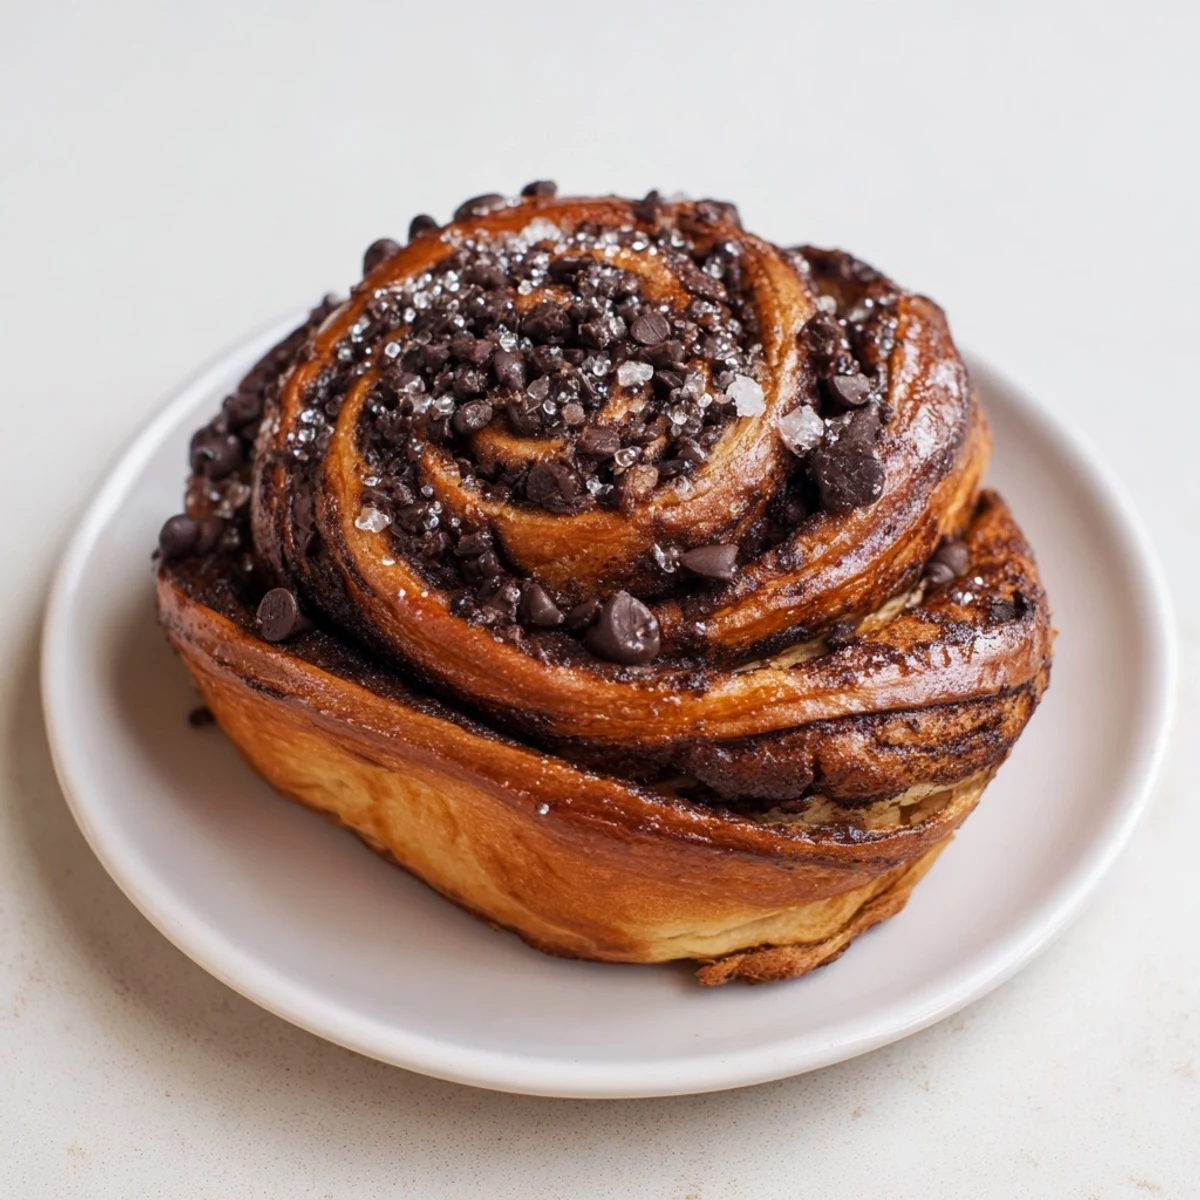
 This festive morning bun combines a tender brioche dough with a rich filling of cocoa, espresso, and peppermint. The dough is kneaded until silky, filled generously, rolled, and sliced to create swirls of chocolate and mint flavor. After a gentle rise, the buns bake to golden perfection. A final dusting of peppermint sugar and optional glaze adds sparkle and cool freshness, making each bite a decadent start to your day.
I discovered peppermint mocha buns one December morning at a tiny bakery in Portland, tucked between holiday shoppers and steaming espresso machines. The baker, Maria, let me watch as she pulled a tray of these jeweled pastries from the oven—soft brioche spirals studded with chocolate and swirled with espresso, their tops glittering with crushed peppermint candy like fresh snow. I asked for the recipe that day, and she smiled and said, 'It's not magic, just love and good timing.' Now, every winter, I recreate that moment in my own kitchen.
I remember my sister arriving unexpectedly on a snowy morning and finding these cooling on my counter. She closed her eyes with that first bite and said, 'This is what December should taste like.' We spent the whole morning drinking coffee and talking with powdered sugar on our faces, and suddenly these weren't just pastries—they were a moment we needed.
Ingredients
- All-purpose flour (3 1/2 cups): The foundation for your dough—it's the architecture that holds everything together. Use fresh flour if you can; older flour absorbs more liquid and can make your dough heavy
- Granulated sugar for dough (1/3 cup): Not just sweetness, but food for the yeast. It helps activate the magic that makes your dough rise into clouds
- Instant yeast (2 1/4 tsp): Check your expiration date—dead yeast won't rise, and there's nothing sadder than a flat pastry. Store it in the fridge after opening if you want it to last
- Fine sea salt (1 tsp): This isn't just seasoning; it strengthens gluten and keeps your dough from spreading too fast. Don't skip it
- Whole milk, lukewarm (3/4 cup): Warm, not hot. Too hot kills yeast; too cold slows it down. Think bathwater temperature
- Large eggs, room temperature (2): Cold eggs don't mix smoothly. Pull them out an hour before you start, and your dough will be silkier
- Unsalted butter for dough (1/2 cup): Softened means you can leave fingerprints in it. This is the secret to tender, enriched brioche
- Unsalted butter for filling (1/2 cup): A separate batch, softened the same way, ready to cradle your chocolate and spice
- Packed brown sugar (1/2 cup): Its molasses adds deep, warm notes that white sugar can't match. Don't skip this for the other kind
- Unsweetened cocoa powder (2 tbsp): The real deal, not hot chocolate mix. It brings bitterness that balances the sweetness perfectly
- Instant espresso powder (1 tbsp): This doesn't taste like coffee—it tastes like the ghost of coffee, mysterious and rich. Don't use regular instant coffee granules
- Peppermint extract (1/2 tsp in filling, 1/2 tsp in topping, 1/4 tsp in glaze): A little goes a long way. This is the star that ties everything together. Use quality extract; the cheap stuff tastes medicinal
- Mini chocolate chips (1/2 cup): Mini is better than chunks here—they distribute evenly and melt into every spiral. Some people swap dark chocolate pieces for more intensity
- Granulated sugar for topping (1/3 cup): Mixed with peppermint extract, this becomes the glittering crown on top
- Crushed candy canes (about 1/4 cup from 2 canes): Smash them while they're still in the wrapper—it's weirdly therapeutic. The texture matters; you want sparkly shards, not powder
- Powdered sugar for glaze (1 cup): Optional, but it adds a tender sweetness that makes these feel like a treat
Instructions
- Bring everything to the table:
- Gather your flour, sugar, yeast, salt, milk, eggs, and that softened butter. Room temperature ingredients mix faster and more smoothly—this is not a step to rush. If you're using a stand mixer, attach the dough hook now
- Build your dough foundation:
- In your large bowl or mixer, combine the flour, sugar, yeast, and salt—these are your dry squad. Pour in the lukewarm milk and add your room-temperature eggs. Mix on low speed until you see a shaggy, rough dough that looks like it barely knows what it's doing. This should take about 2 minutes. Don't worry if it's messy
- Introduce the butter slowly:
- Here's where patience matters. Add your softened butter a tablespoon at a time, mixing on low until each piece is nearly incorporated before adding the next. This seems tedious, but it's the difference between silky brioche and greasy dough. As the butter comes in, the dough will transform—first it'll look slick and broken, then suddenly, it'll come together into something smooth and elastic. Keep mixing for 8–10 minutes total until the dough is supple and springs back when you poke it
- Let time work its magic:
- Place your dough in a lightly oiled bowl and cover it with a clean kitchen towel or plastic wrap. Find a warm spot—near a sunny window, on top of the fridge, or in a slightly warm oven works. Let it rise until it's doubled in size, about 1–1.5 hours. You'll know it's ready when you press your finger into it and the indent stays
- Prepare your filling while you wait:
- In a small bowl, beat together that second portion of softened butter with the brown sugar until light and fluffy—this takes about 2–3 minutes with a hand mixer or wooden spoon. Sift in your cocoa powder and espresso powder (sifting prevents lumps), add the peppermint extract, and beat until you have a smooth, spreadable mixture that smells like a fancy coffee shop
- Shape your spirals:
- Once your dough has doubled, gently punch it down—don't be aggressive, just deflate it. Turn it out onto a lightly floured surface and roll it into a rectangle about 12 inches wide and 18 inches long. Use your hands as much as your rolling pin; brioche dough is forgiving. Spread your filling evenly over the entire surface, leaving a small border. Sprinkle the mini chocolate chips over the filling in an even layer
- Roll it into a log:
- Starting from one long edge, roll the dough tightly toward you, sealing the seam by pinching as you go. You want it firm but not crushed. Imagine you're rolling up a poster, not squeezing a stress ball
- Slice with intention:
- Using a sharp, serrated knife or dental floss (yes, really—it won't crush the dough), cut your log into 12 equal pieces. A gentle sawing motion works better than a hard chop. If you're using floss, slide it under the log and cross the ends over the top, pulling quickly and firmly
- Arrange and prepare to rise again:
- Place each bun cut-side up in a buttered 9x13-inch baking dish. They should nestle together but not touch. Cover loosely with a towel and let them rise for 30–45 minutes. They should puff up and look soft and puffy, not quite doubled, but definitely fuller than when you placed them
- Bake until golden:
- Preheat your oven to 350°F (175°C). When your buns are puffy, bake them for about 25 minutes until they're golden brown on top and set in the middle. A toothpick inserted into the thickest bun should come out clean. The kitchen will smell like a dream
- Make your sparkly topping:
- While the buns are baking, mix your granulated sugar with the peppermint extract in a small bowl. Crush those candy canes into sparkly shards and stir them in. The peppermint extract will turn the sugar slightly damp and the color will be a pale pink—exactly what you want
- Optional glaze for extra indulgence:
- If you're making the glaze, whisk together your powdered sugar, milk, and peppermint extract until it's smooth and pourable—think of the consistency of heavy cream. You want it thin enough to drizzle but thick enough to coat
- The finishing touch:
- Let your buns cool for just a few minutes—they should still be warm but not burning hot. Sprinkle that peppermint sugar generously over each one, letting it stick to the warmth. If you're using glaze, drizzle it in a delicate pattern across the top. Serve while warm, with a hot mocha or peppermint hot chocolate alongside
 Save to Pinterest
 I baked these for a winter book club, and they became more famous than the book we were supposed to discuss. One friend asked for the recipe to make them for her daughter's Christmas morning. Another called me weeks later just to say she'd finally nailed them. That's when I realized these buns had become more than breakfast—they'd become a thread connecting my kitchen to others', a gift that kept giving long after they were eaten.
The Overnight Method
If you want to wake up to fresh-baked buns without the early morning work, refrigerate your shaped buns after slicing (step 7). Cover them tightly with plastic wrap and pop them in the fridge overnight. In the morning, remove them 30 minutes before baking to come to room temperature, then bake as directed. The cold rise actually deepens the flavors—something about time and patience makes everything better.
Customizing Your Filling
The beauty of these buns is how flexible they are. Some mornings I use dark chocolate chunks instead of mini chips for something more sophisticated. Others I add a tiny pinch of cayenne pepper to the cocoa mixture for a subtle kick that makes people ask, 'What is that flavor?' You could swap the peppermint for different extracts—almond, vanilla, even a touch of rum extract—and the method stays exactly the same. The ratio of cocoa to espresso to peppermint is what makes these work, so play with fillings, not proportions.
Serving and Storage
These buns are best warm, within a few hours of baking. But they're honestly still wonderful the next day—wrap them gently in foil and reheat at 300°F for about 10 minutes. For longer storage, freeze them in an airtight container for up to three weeks. Thaw at room temperature and warm before serving. I always make two batches because one never survives to the second day, and I like having frozen ones for unexpected visitors.
- Serve with hot coffee or that promised peppermint hot chocolate to complete the experience
- They're small enough to grab one with your hands, large enough to feel indulgent
- The glaze adds a touch of elegance, but the buns are equally beautiful without it if you're pressed for time
 Save to Pinterest
 These peppermint mocha morning buns are the kind of recipe that becomes tradition. Make them once and people will ask for them every December. Make them twice and you'll have perfected your technique. Make them three times and they'll taste like home.
Recipe Questions & Answers
- → What type of flour is best for the dough?
-
All-purpose flour provides the right balance of structure and softness for tender brioche dough.
- → Can I prepare the dough ahead of time?
-
Yes, shaping the buns and refrigerating overnight before baking enhances flavor and offers convenient timing.
- → How do the peppermint and mocha flavors combine?
-
Espresso and cocoa create a deep mocha base, while peppermint adds a refreshing brightness that complements the richness.
- → What alternatives are there for chocolate chips?
-
Chopped dark chocolate can be substituted for mini chocolate chips to increase richness and texture.
- → Is it necessary to glaze the buns?
-
The glaze is optional but adds a sweet, smooth finish that enhances the peppermint notes and visual appeal.
- → How should the peppermint sugar topping be stored?
-
Keep the topping dry until ready to use to maintain its sparkle and texture on the baked buns.
