 Save to Pinterest
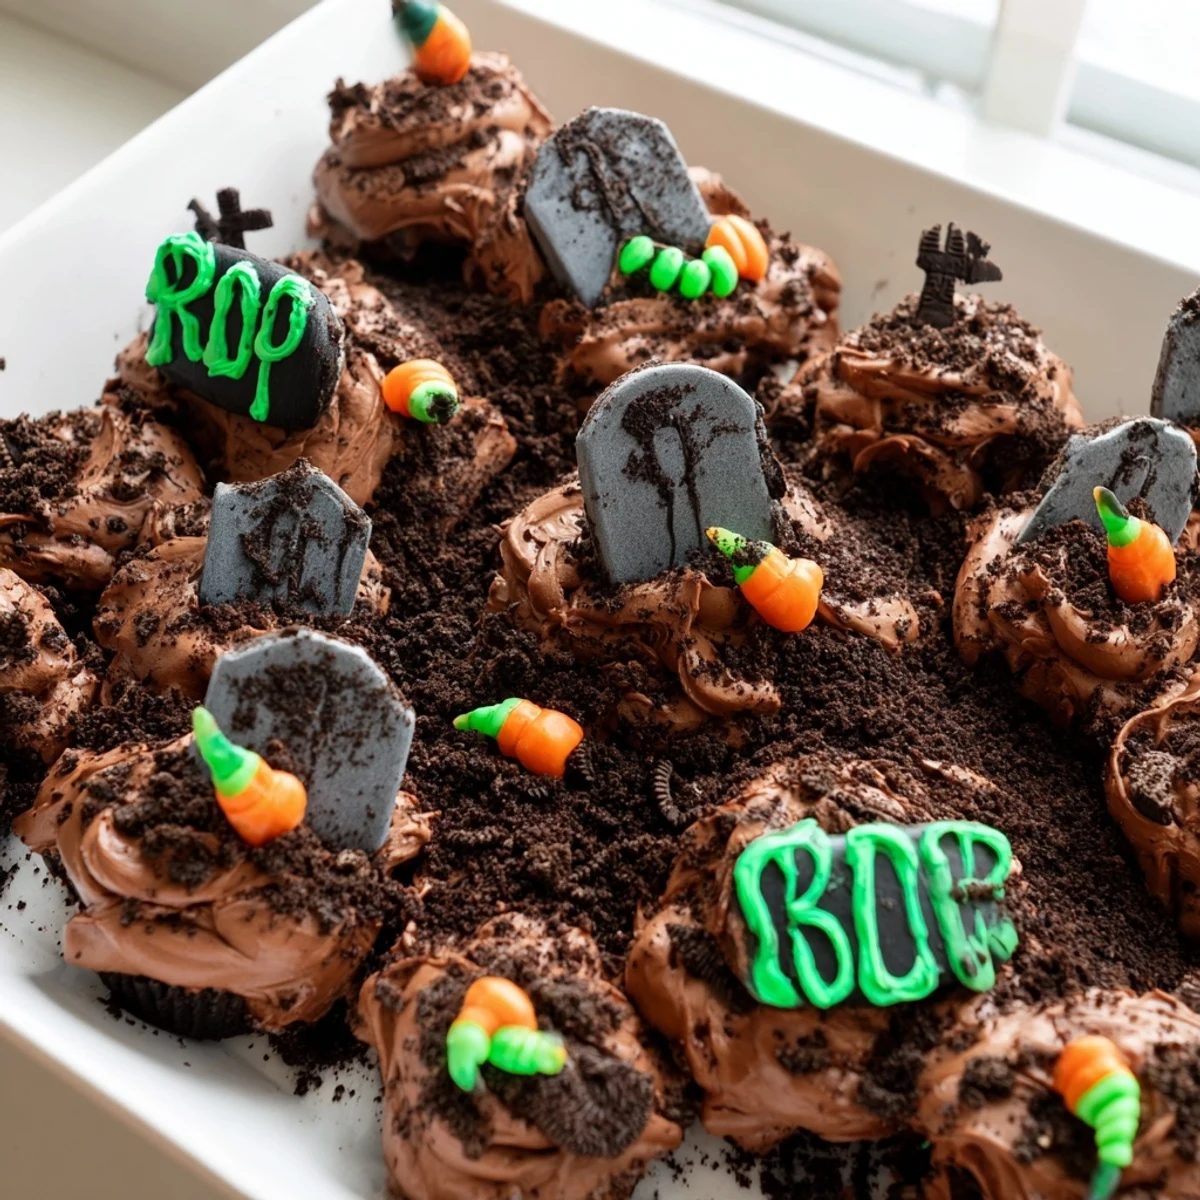
 These hauntingly sweet treats combine moist chocolate cupcakes with rich cocoa frosting, crushed cookie "dirt," and decorated tombstone cookies. The assembly creates a graveyard scene that's both delicious and festive. Kids can help decorate with gummy worms, candy pumpkins, and spooky messages. The pull-apart style makes serving easy at Halloween parties.
The first time I brought these graveyard cupcakes to a Halloween potluck, I watched my friend's six-year-old daughter literally gasp when she saw them. She spent ten minutes arranging and rearranging the gummy worms like she was directing a tiny spooky movie set. That moment sold me forever on the power of food that doubles as entertainment.
Last October my neighbor caught me through the window crushing Oreos with a rolling pin and just nodded like she understood completely. People have this way of recognizing Halloween baking chaos. Later that week she texted me asking for the recipe because her daughter wouldn't stop talking about the cemetery cupcakes.
Ingredients
- 1 ½ cups all-purpose flour: Spoon and level instead of scooping directly to avoid packing too much in
- 1 cup granulated sugar: Room temperature butter creamed with this is what gives the cupcakes their tender crumb
- ½ cup unsalted butter, softened: Leave it out for at least an hour, it makes creaming infinitely easier
- ½ cup whole milk: Adds moisture and richness that keeps the cupcakes from drying out
- 2 large eggs: Also at room temperature, they emulsify better into the batter
- 2 tsp baking powder: Double-check yours is fresh, expired baking powder makes flat cupcakes
- 1 tsp vanilla extract: Use real vanilla here, the flavor really comes through in simple cakes
- ¼ tsp salt: Balances the sweetness and enhances chocolate flavor
- 1 cup unsalted butter for frosting: This needs to be very soft but not melting to get that silky smooth texture
- 2 ½ cups powdered sugar: Sift it first to avoid any lumps in your frosting
- ½ cup unsweetened cocoa powder: Dutch-processed gives a darker, more intense chocolate flavor
- 2-3 tbsp milk: Start with less and add gradually until you reach spreadable consistency
- Chocolate sandwich cookies: Any brand works but the darker ones look more like real soil
- Rectangular cookies for tombstones: Shortbread or vanilla wafers work perfectly for writing on
- Gel icing pens: Get the kind with fine tips for the neatest writing on tombstones
Instructions
- Preheat and prep your baking space:
- Set your oven to 350°F and line a 12 cup muffin tin with liners. Do this first so you're not scrambling once the batter is mixed.
- Mix the cupcake batter:
- Cream the butter and sugar until it looks pale and fluffy, about 3 minutes. Beat in eggs one at a time, then vanilla, and whisk the dry ingredients separately before alternating them with milk into the wet mixture.
- Bake until perfectly done:
- Fill each liner two thirds full and bake for 18 to 20 minutes. They're done when a toothpick comes out clean and the tops spring back when touched.
- Make the chocolate frosting:
- Beat the butter until creamy, then gradually add powdered sugar and cocoa. Pour in vanilla and just enough milk to make it smooth and spreadable.
- Arrange your graveyard base:
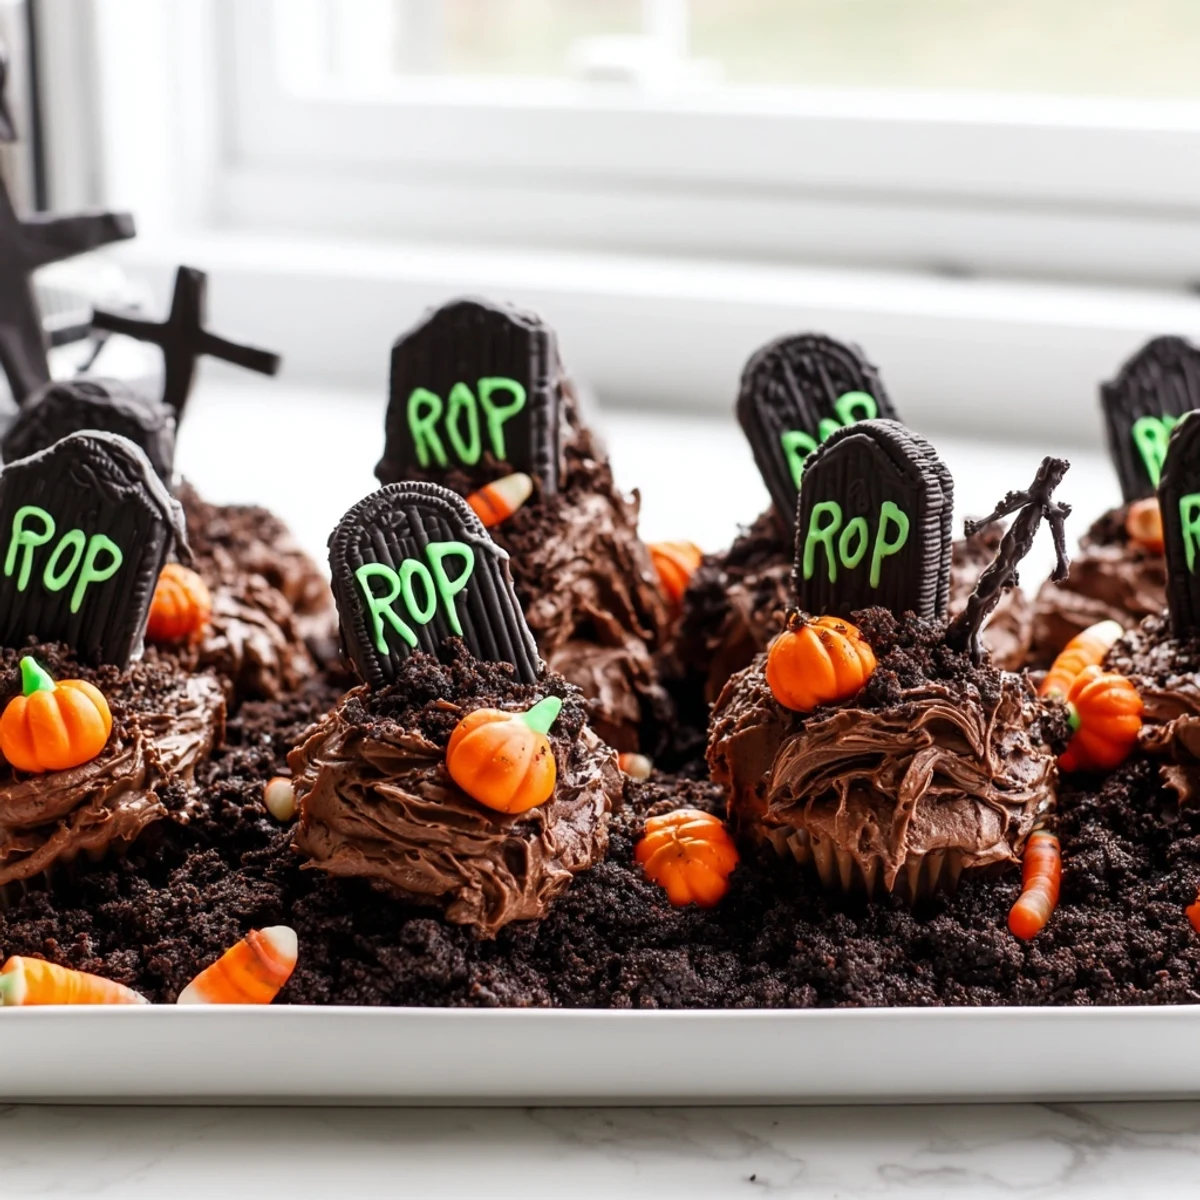
- Place cooled cupcakes touching each other on a tray and frost them all together like one surface. This is what creates the pull apart effect.
- Create the spooky decorations:
- Crush chocolate cookies and sprinkle over the frosting. Write RIP or spooky messages on rectangular cookies and press them into the cupcakes as tombstones.
- Add final creepy details:
- Tuck gummy worms halfway into the dirt, add candy pumpkins, and chill briefly so everything stays put when serving.
 Save to Pinterest
 My sister's kids now request these every single October, and they've started getting competitive with their tombstone designs. Last year her seven-year-old wrote 'Here lies my homework' on one, which honestly might be my favorite graveyard joke yet.
Making Them Look Truly Spooky
The cookie dirt effect works best when you vary the texture. Leave some pieces slightly chunky and crush others into fine crumbs, then layer them for a more realistic soil look. I've found that pressing the crumbs gently into the frosting helps them stay put.
Setting Up A Decorating Station
When I make these with kids, I put all the decorations in separate bowls and let everyone go to town. It turns dessert prep into an activity and the results are always more creative than anything I'd plan myself. Plus it keeps them occupied while the cupcakes cool.
Timing Your Halloween Prep
You can bake and frost the cupcakes a day ahead and keep them covered at room temperature. Add the cookie dirt and tombstones within a few hours of serving though, or the cookies start to soften from the frosting moisture.
- Set up your decorating station with small bowls for each topping
- Have damp paper towels ready for sticky fingers during decorating
- Take pictures before serving because they disappear fast at parties
 Save to Pinterest
 There's something about watching adults get just as excited about crushing cookies and writing silly tombstone messages that makes these worth the extra effort. Halloween baking should be fun, not perfect.
Recipe Questions & Answers
- → How far ahead can I make these?
-
Bake cupcakes up to 2 days ahead and store in an airtight container. Frost and decorate the day of serving for best results. The frosting helps keep them fresh for 24 hours once assembled.
- → Can I use boxed cake mix?
-
Absolutely! Use your favorite chocolate cake mix to save time. The homemade frosting and decorations are what make these special, so the cupcakes can be simplified without losing the spooky effect.
- → What cookies work best for tombstones?
-
Rectangular biscuits like shortbread, vanilla wafers, or graham crackers work perfectly. They're sturdy enough to hold icing messages and stand up in the frosting without breaking.
- → How do I make these gluten-free?
-
Substitute gluten-free flour blend for the all-purpose flour and ensure all cookies and decorations are certified gluten-free. The taste and texture remain just as delicious.
- → Can I freeze the unfrosted cupcakes?
-
Yes! Wrap cooled cupcakes tightly in plastic wrap and freeze for up to 3 months. Thaw at room temperature before frosting and decorating. This makes party planning much easier.
- → What other decorations can I use?
-
Get creative with candy bones, marshmallow ghosts, pretzel fences, or crushed Oreos for varying dirt textures. Edible glitter or colored sugar adds extra sparkle to your graveyard scene.
