 Save to Pinterest
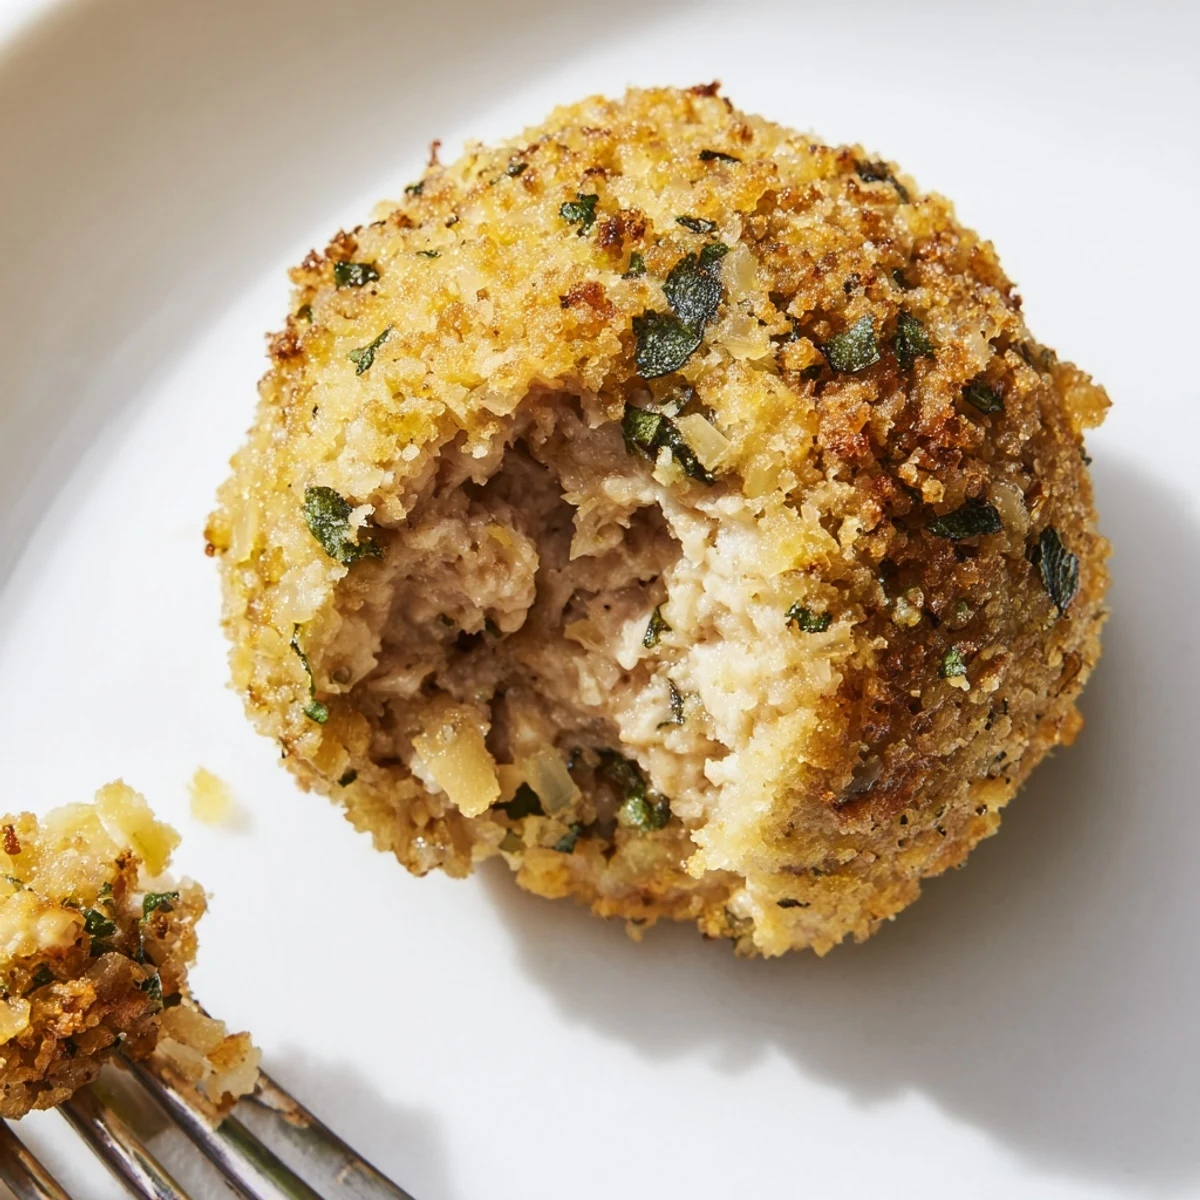
 Combine ground thigh chicken with sautéed onion, garlic, chopped fresh sage, thyme, breadcrumbs and beaten egg. Gently mix, form tablespoon-sized balls, brush with olive oil and bake at 200°C (400°F) for 20–25 minutes until golden and 74°C internal. Rest briefly, then serve warm with honey-mustard, cranberry sauce or roasted roots.
The particular fragrance of fresh sage always takes over my kitchen long before these chicken balls make it to the oven. There’s something satisfying about watching onions and garlic slowly turn sweet in a warm pan, their aroma mingling with herbs. On a rainy afternoon last spring, I started making these simply to use up leftover sage—and the result surprised me. Simple ingredients, but every time the flavor delivers more than expected.
I still remember making these chicken balls for a neighborhood potluck, nervously watching the tray disappear long before any other dish. My friend Angela confessed she was sure it was pork because of the moist texture, only to ask for the recipe right after her second helping.
Ingredients
- Ground chicken (preferably thigh meat): The thighs provide moisture and deeper flavor, ensuring these balls stay succulent instead of dry.
- Onion, finely diced: Sweating the onion slowly adds both sweetness and juiciness—I’ve found yellow onions are especially good here.
- Garlic cloves, minced: Adding garlic just after the onion lets it turn mellow, never harsh.
- Fresh sage (or dried sage): I prefer fresh, as it perfumes the whole kitchen, but dried works surprisingly well in a pinch.
- Salt and black pepper: Necessary for seasoning; don’t skimp.
- Dried thyme: It adds another layer that rounds out the herbiness.
- Nutmeg (optional): Use a pinch—too much quickly overpowers, but just a hint is magic.
- Breadcrumbs (regular or gluten-free): They hold everything together; gluten-free work just as well and don’t change the texture.
- Large egg, lightly beaten: The final binder—mix in gently so the balls stay light.
- Olive oil: Both for sautéing and baking, it’s the secret to the golden, slightly crisp exterior.
Instructions
- Prep your oven and tray:
- Switch the oven on to 200°C (400°F). Get a baking tray lined with parchment or oiled, ready for action.
- Sweat the onion and garlic:
- Warm 1 tablespoon olive oil in a skillet, add the onion, and let it soften—wait for its sweet note before stirring in the garlic for just another minute. Let this cool off slightly to avoid scrambling the egg later.
- Combine the chicken mixture:
- In a big bowl, gather the chicken, cooled onion and garlic, sage, thyme, salt, pepper, and the tiniest pinch of nutmeg. Work gently so everything is evenly distributed—I use my hands for this bit.
- Add binders:
- Scatter in the breadcrumbs and pour in the beaten egg, then mix just until you see everything come together. Overmixing here will make them dense, so stop as soon as it holds shape.
- Shape the balls:
- Wet your hands and scoop out tablespoon-sized amounts, rolling them into balls (about 20 in total) and placing them on your tray in rows.
- Oil and bake:
- Brush the tops with the remaining olive oil, or drizzle if you prefer. Bake for 20–25 minutes, flipping halfway, until bronzed and the aroma is irresistible—just check for 74°C/165°F inside if you’re precise.
- Serve with style:
- These are best hot from the tray, with a tangy dip or alongside roasted veg.
 Save to Pinterest
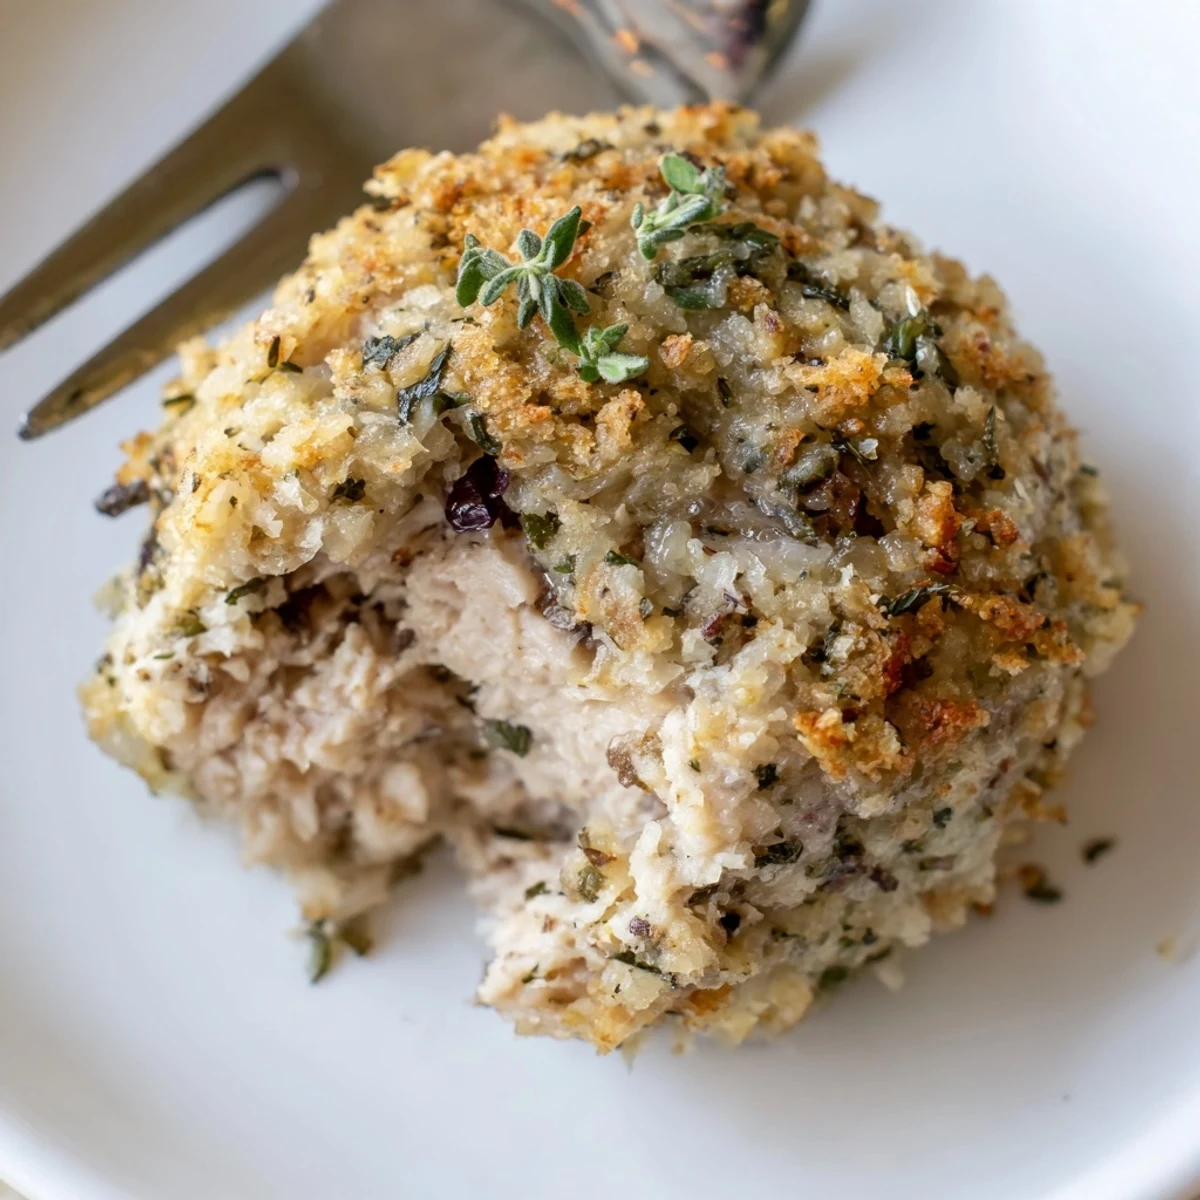
 There’s a photo I snapped one winter evening of my little niece giggling, chicken ball halfway to her mouth, asking if there was ‘magic’ in them because they were so soft. It’s become our go-to winter meal, eaten around the table with laughter and hands reaching for just one more.
Serving Ideas That Always Work
I’ve discovered these chicken balls pair up beautifully with roasted carrots and parsnips for a wholesome plate. For parties, I pile them high with a honey-mustard dip in the center. Sometimes, I tuck them into flatbreads with crunchy greens and call it dinner on the run.
Kitchen Swaps and Gluten-Free Tweaks
One nice thing about this recipe is how easily it adapts for gluten-free eaters—just sub in your favorite GF breadcrumbs, and nothing else changes. I’ve also tried parsley in place of sage when the garden’s out, and even a diced apple for a slightly sweeter bite. Just keep the basic ratios the same and experiment from there.
Making a Big Batch and Storing Leftovers
When I make a double batch for meal prep, I let the cooked balls cool completely before sealing them up in a container for the fridge or freezer. They don’t lose their juiciness and reheat well in a low oven or microwave—never rubbery, always tender.
- Store cooled leftovers in an airtight container for up to 3 days in the fridge.
- They freeze well—just thaw and gently reheat before serving.
- Remember to check that the internal temperature is piping hot if reheating from frozen.
 Save to Pinterest
 There’s satisfaction in a recipe that brings people together with minimal fuss and lots of flavor. Hope this one becomes an easy favorite in your home, too.
Recipe Questions & Answers
- → How do I keep the chicken balls moist?
-
Choose thigh meat for more fat, sauté the onion first to add moisture, and avoid overmixing the mixture. Gentle handling and a quick bake at a high temperature help seal juices while cooking through.
- → Can I make these gluten-free?
-
Yes. Swap regular breadcrumbs for a certified gluten-free alternative or use ground oats or crushed rice crackers. Check all labels for hidden gluten and adjust binders if using very absorbent substitutes.
- → Is baking the best cooking method or can I fry them?
-
Baking gives an even golden crust with less oil and is convenient for a batch. For a crisper exterior, pan-fry briefly in hot oil to brown, then finish in the oven to cook through without drying out.
- → How can I tell when they are fully cooked?
-
Use an instant-read thermometer: the center should reach 74°C (165°F). Visually they will be golden brown and juices should run clear. Cutting one open to check texture is also fine.
- → What are good serving suggestions?
-
Serve hot with honey-mustard, cranberry sauce, or a tangy dip. They pair nicely with roasted root vegetables, crisp salads or inside warm wraps for a fuller plate.
- → How should I store and reheat leftovers?
-
Refrigerate in an airtight container for up to 3 days or freeze on a tray then bag for up to 2 months. Reheat from frozen in a 180°C oven until hot, or warm refrigerated portions in the oven to retain crispness.
