 Save to Pinterest
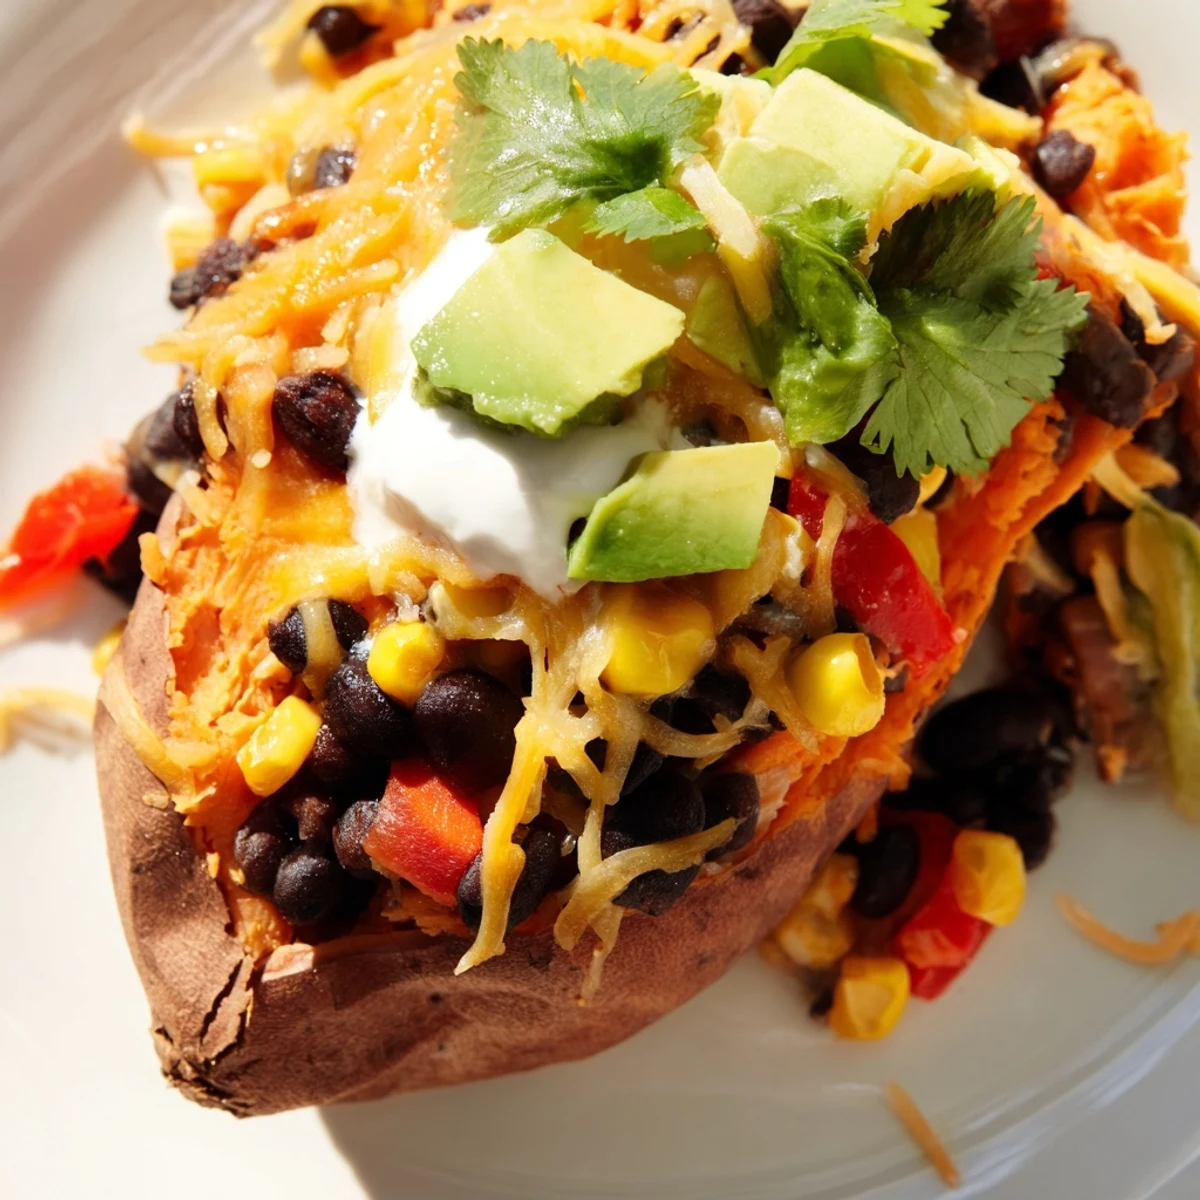
 Enjoy crispy baked sweet potato skins filled with a savory mixture of black beans, corn, and diced bell peppers, seasoned with cumin, paprika, and chili powder. Topped with melted cheddar and garnished with sour cream, avocado, fresh cilantro, and green onions, these skins offer a satisfying balance of textures and flavors. Perfect as a light meal or appetizer, they come together with simple preparation and baking steps, catering well to vegetarian and gluten-free diets.
The first time I made these loaded sweet potato skins, I was standing in my kitchen on a Sunday afternoon with a handful of ingredients and absolutely no plan. I'd roasted the potatoes earlier that morning, scooped them out almost reflexively, and suddenly had these perfect little edible vessels sitting on my counter. What started as not wanting to waste good potato skin turned into something I couldn't stop making—crispy, warm, stacked with beans and cheese and all the bright toppings that make you feel like you're doing something right in the kitchen.
I remember bringing a tray of these to a potluck last fall and watching them disappear in minutes while I was still setting them down on the table. A friend asked for the recipe right there, mid-bite, and I realized these weren't just my weird kitchen experiment anymore—they were something people actually wanted to cook. That moment shifted how I thought about what belonged on a dinner table.
Ingredients
- Sweet Potatoes: Four medium ones become vessels for everything delicious—pick ones that are roughly the same size so they bake evenly and look beautiful when plated.
- Black Beans: One can, drained and rinsed well because that starchy liquid can make things soggy, and we want texture here.
- Corn Kernels: Fresh is lovely if you have it, but frozen works beautifully and sometimes tastes sweeter because it's picked at peak ripeness.
- Red Bell Pepper: Half a cup, finely diced so it softens just enough to blend with the beans but still keeps its color and slight crunch.
- Green Onions: Two sliced, with the white and light green parts going into the filling and the dark green reserved for that final bright garnish.
- Cumin, Smoked Paprika, Chili Powder: These three spices build a warmth that makes everything taste like it's been slowly simmered, even though we're just mixing them raw into the beans.
- Salt and Black Pepper: Half a teaspoon and a quarter teaspoon because you're seasoning the filling, and the cheese and sour cream will add their own salt later.
- Cheddar Cheese: One cup shredded—Monterey Jack gives you a different kind of melt if you're feeling experimental.
- Sour Cream or Greek Yogurt: A quarter cup cold from the fridge, and this is the moment when everything gets tangy and alive.
- Avocado: One small one, sliced just before serving because it browns and loses something if it sits too long.
- Fresh Cilantro: Chopped and scattered on top because it wakes everything up with its brightness.
- Lime Wedges: Optional but worth it—a squeeze over the top changes everything.
Instructions
- Get Your Oven Ready and Line Your Sheet:
- Preheat to 400°F and line a baking sheet with parchment paper—this prevents sticking and makes cleanup disappear, which is always a win.
- Scrub and Pierce Your Sweet Potatoes:
- Wash them under cold water and poke each one several times with a fork so steam can escape and they cook evenly inside. This is the small move that prevents explosions and ensures tender flesh.
- Bake Until Fork-Tender:
- Forty to forty-five minutes until they yield completely when you push a fork in, which means the flesh is soft enough to scoop but the skin stays intact and sturdy.
- Cool and Hollow Out:
- Once they're cool enough to touch, cut each potato in half lengthwise and scoop out the insides carefully, leaving about a quarter-inch of flesh clinging to the skin so it doesn't collapse. Those scooped insides become mashed potatoes or something entirely new another night.
- Increase Heat and Arrange:
- Turn the oven up to 425°F and arrange your hollowed skins cut-side up on the baking sheet, which is the moment they stop being just baked potatoes and start becoming the vessel for something more.
- Build Your Black Bean Mixture:
- In a bowl, combine the drained beans, corn, diced pepper, green onions, and all your spices—cumin, paprika, chili powder, salt, and pepper stirred together until everything smells warm and alive.
- Fill and Top with Cheese:
- Spoon the mixture evenly into each skin and top generously with shredded cheese, which will bubble and brown and create those crispy edges you're after.
- Bake Until Cheese Melts and Skins Crisp:
- Ten to twelve minutes in the hotter oven, watching as the cheese turns golden and the skin edges curl slightly, becoming almost chip-like in texture.
- Cool Slightly and Finish:
- Remove from the oven and let them sit for a minute, then top with cold sour cream, fresh avocado, cilantro, more green onions, and a squeeze of lime if you have it.
 Save to Pinterest
 These became the thing I made when someone said they were hungry but also vegetarian, or when I wanted appetizers that didn't feel like I'd spent hours in the kitchen. There's something about feeding people food that's clearly made with care but doesn't demand you stayed up until midnight—it shifted what I thought was possible on a weeknight.
Building Flavor with the Right Spices
The combination of cumin, smoked paprika, and chili powder works because each one brings something different to the table—warmth from cumin, depth from the smoke, and a gentle heat from the chili that sneaks up on you. When you mix them together raw into the beans, they meld with the natural starchiness and create this flavor base that tastes like you've been simmering things for hours. I learned this the hard way after once trying to bloom them in oil separately, which made them overpowering, so now I trust the quiet mixing method and let the potato's natural sweetness balance everything out.
Making This Your Own
The skeleton of this dish is strong enough that it actually welcomes improvisation—swap the black beans for pinto if that's what you have, add jalapeños if heat calls to you, or use whatever cheese is in your refrigerator. I've made versions with cotija instead of cheddar, or with a mix of both, and the dish shifts slightly each time but always lands in the same beautiful place. The magic isn't in rigid adherence to one specific ingredient list; it's in respecting the structure of potato, beans, cheese, and fresh garnish.
Serving and Storage Ideas
These work as an appetizer for a larger meal, a light dinner with a big salad beside them, or even a party offering that people genuinely get excited about. They're best served warm, right after assembly, when the cheese is still melted and the avocado is creamy and the sour cream hasn't warmed up too much. You can bake them in advance and reheat gently, or prep everything but the toppings ahead of time and finish them fresh when guests arrive, which is the kind of flexibility that keeps you sane when cooking for others.
- Prep the filling and hollow potatoes up to a day ahead, then bake and top fresh right before serving.
- These don't keep well once assembled because the avocado darkens and the skins lose their crispness, so plan to serve them immediately.
- Leftovers are still good cold the next day if you're willing to eat them without the sour cream and fresh garnishes.
 Save to Pinterest
 There's something deeply satisfying about taking two simple things—a sweet potato and a can of beans—and creating something that tastes intentional and nourishing. I still make these when I want to feel like I'm cooking without feeling like I'm stressed.
Recipe Questions & Answers
- → Can I make this vegan?
-
Yes, substitute dairy cheese with plant-based cheese and use non-dairy yogurt or sour cream alternatives for garnishing.
- → How do I keep the sweet potato skins crispy?
-
Leave a thin border of sweet potato flesh to keep skins sturdy and bake at a higher temperature after filling to crisp the skins.
- → What variations can I try with the filling?
-
Try swapping black beans for pinto beans or adding jalapeño for a spicy kick.
- → Are these suitable for gluten-free diets?
-
Yes, all ingredients are naturally gluten-free, but always verify labels to ensure no cross-contamination.
- → Can this be served as a main dish?
-
Definitely; pair with a fresh salad for a complete vegetarian meal.
