 Save to Pinterest
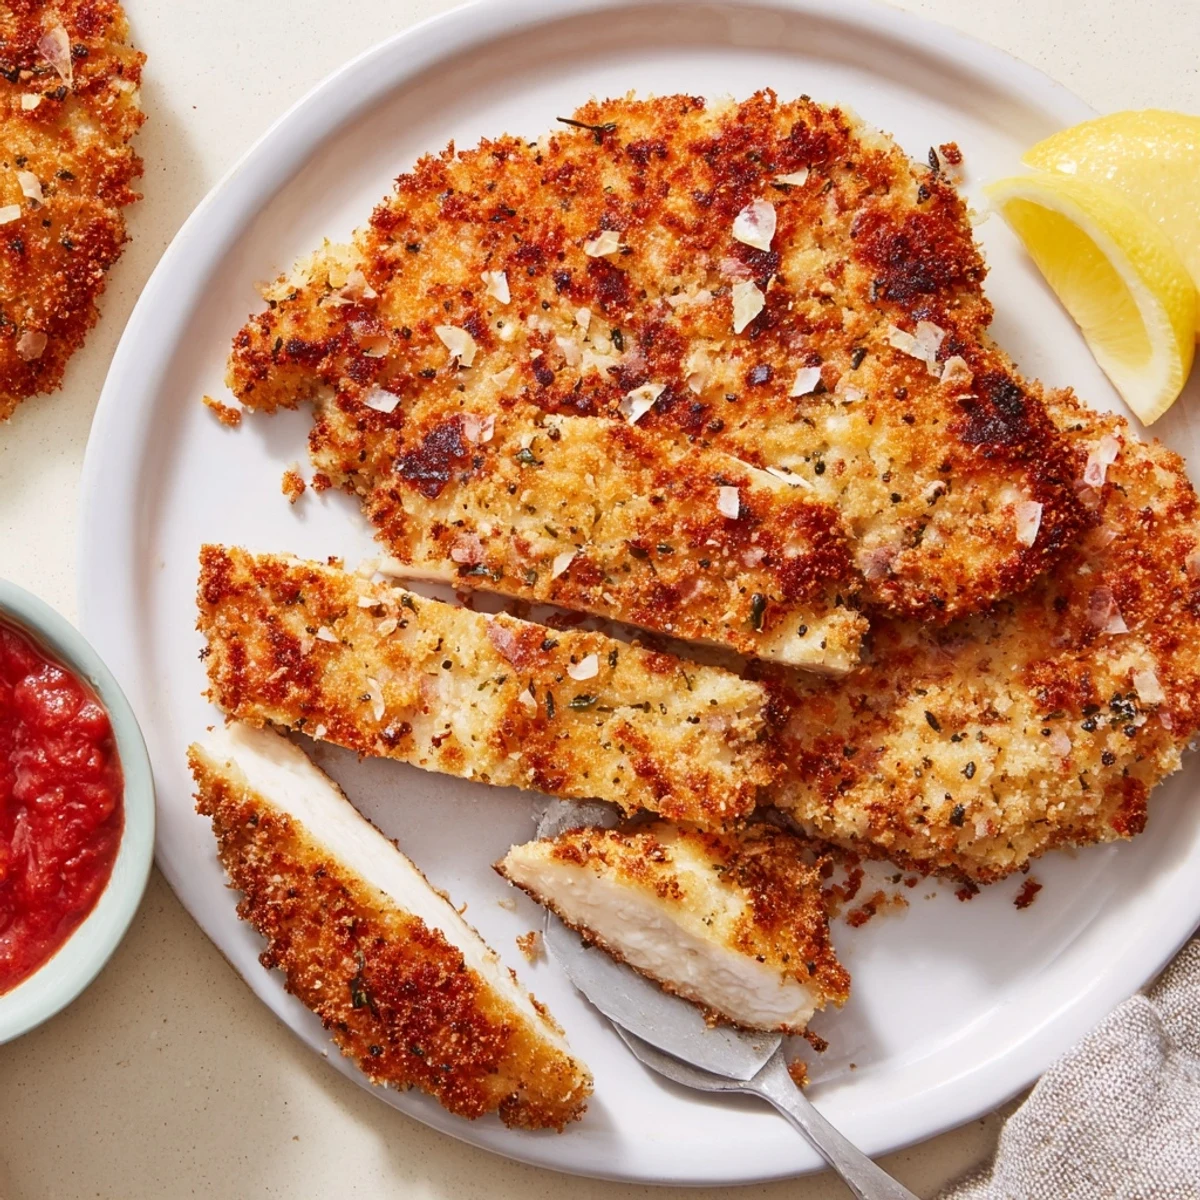
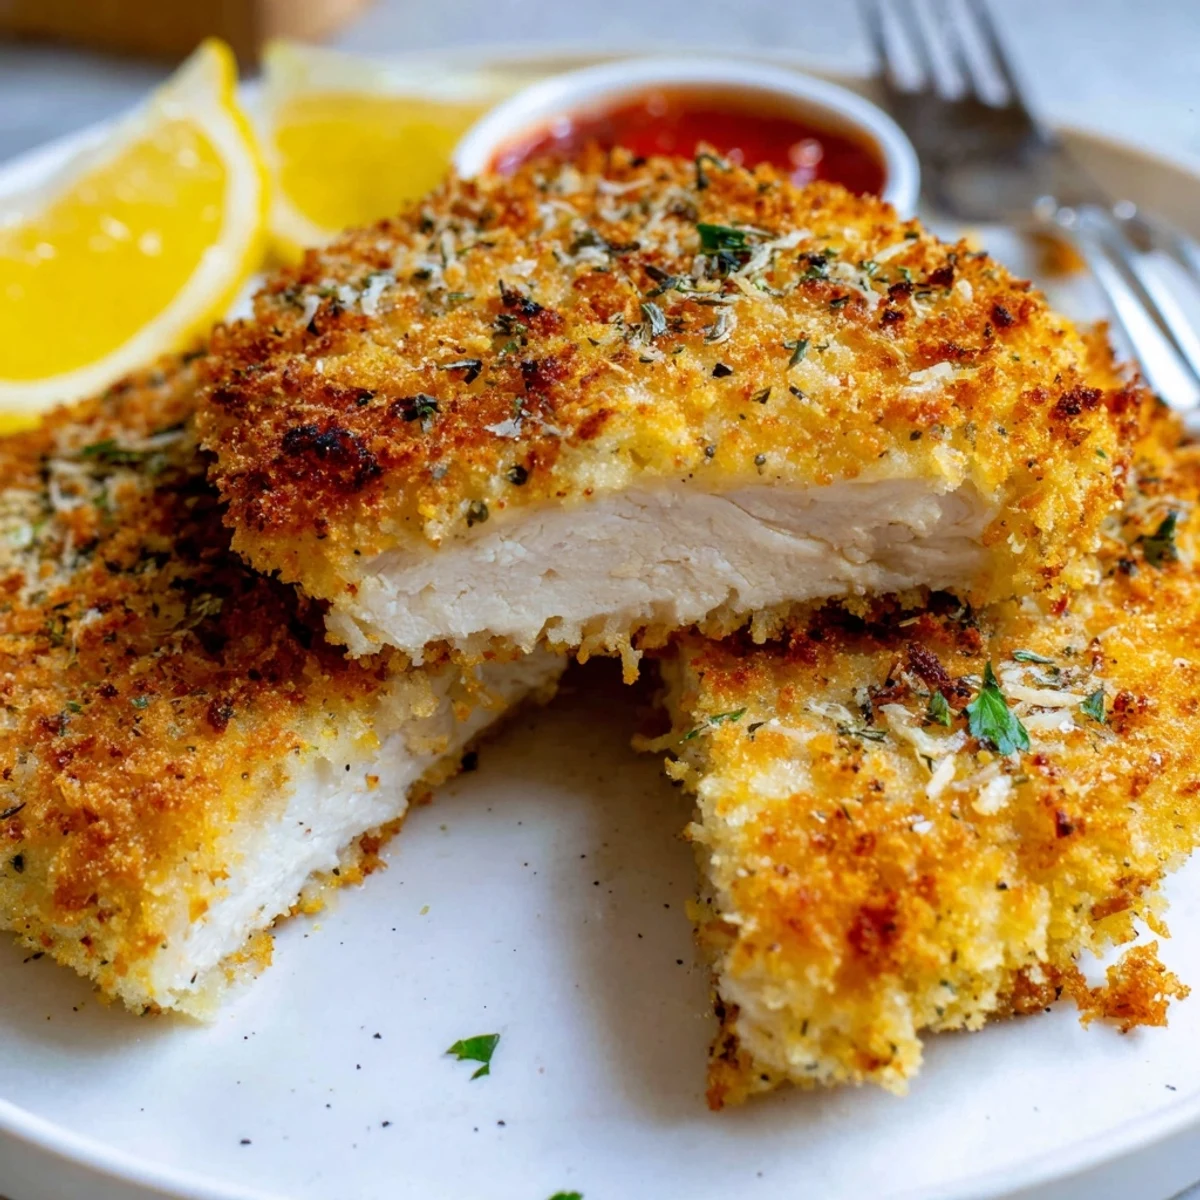
 Pound boneless chicken breasts to an even thickness, dredge in flour, dip in an egg wash, then press into a seasoned panko and grated Parmesan mix. Pan-fry briefly in a neutral oil to develop a golden crust, finish in a 200°C/400°F oven until internal temperature reaches 75°C/165°F, rest a few minutes, then slice and serve with lemon or marinara.
The sizzle of chicken hitting a hot pan is one of those sounds that makes everyone in the house wander toward the kitchen, and this crispy Parmesan chicken never fails to draw a crowd. My neighbor once knocked on my door holding a bottle of wine, asking what smelled so incredible that it was drifting through the hallway. That golden crust shattering under a knife, revealing juicy meat underneath, is weeknight dinner at its most satisfying.
One Tuesday evening my daughter invited two friends over without telling me, and I panicked with four chicken breasts in the fridge and a cupboard full of panko. Those teenagers cleaned every plate and asked if I could teach their moms how to make it, which remains one of my proudest kitchen moments.
Ingredients
- 4 boneless, skinless chicken breasts, about 150 g each: Pounding them to an even thickness is the single most important step, because it ensures every piece cooks at the same rate and nothing dries out.
- 1 cup, 60 g, panko breadcrumbs: Japanese panko creates an airier, lighter crunch than regular breadcrumbs, and that texture difference is unmistakable.
- 3/4 cup, 50 g, grated Parmesan cheese: Use the gritty kind from the deli section, not the powdery shaker version, because real Parmesan adds depth and a slight nuttiness that carries the whole dish.
- 1 tsp dried Italian herbs: A blend of oregano and basil works beautifully, and you can crush the leaves between your fingers before adding them to wake up the oils.
- 1/2 tsp garlic powder: This distributes garlic flavor evenly through the crust without burning like fresh garlic would in a hot pan.
- 1/2 tsp salt and 1/4 tsp black pepper: Seasoning the breading itself means you will not need to add salt at the table.
- 1/2 cup, 60 g, all-purpose flour: The flour layer gives the egg something to cling to, and skipping it is a mistake you only make once.
- 2 large eggs and 1 tbsp water: The splash of water thins the egg just enough for an even, light coating that does not pull off the flour layer.
- 1/3 cup, 80 ml, vegetable oil: You want a neutral oil with a high smoke point here so the Parmesan browns rather than burns.
Instructions
- Preheat and prepare your baking sheet:
- Set your oven to 200 degrees C, 400 degrees F, and line a baking sheet with parchment paper so the chicken releases easily after its oven finish.
- Pound the chicken evenly:
- Slide each breast between two sheets of plastic wrap and use a mallet or rolling pin to gently flatten them to about 1.5 cm, or half an inch, working from the center outward so they are uniform.
- Set up your breading station:
- Arrange three shallow bowls side by side with flour in the first, beaten eggs mixed with water in the second, and the panko combined with Parmesan, herbs, garlic powder, salt, and pepper in the third, because a tidy station keeps your hands cleaner and the process faster.
- Bread each piece with care:
- Dredge a chicken breast in flour and shake off the excess, dip it into the egg wash letting the extra drip away, then press it firmly into the Parmesan panko mixture on both sides until completely coated.
- Fry until golden:
- Heat the oil in a large skillet over medium high heat and fry the chicken for two to three minutes per side until the crust turns a deep, inviting gold, then transfer each piece to your prepared sheet.
- Finish in the oven:
- Slide the baking sheet into the oven for twelve to fifteen minutes until the internal temperature hits 75 degrees C, 165 degrees F, which keeps the meat juicy while the crust stays intact.
- Rest and serve:
- Let the chicken sit for three minutes before slicing so the juices redistribute, then serve alongside lemon wedges, a simple salad, or whatever makes you happy.
 Save to Pinterest
 The night I made this for my father in law, a man who believes grilled chicken is the only acceptable preparation, he went back for seconds without saying a word, and that silence spoke volumes.
Serving Ideas That Actually Work
A squeeze of fresh lemon over the sliced chicken brightens every bite and cuts through the richness of the Parmesan crust in a way that feels effortless. Marinara spooned alongside turns this into something resembling a lighter chicken Parmesan without the heavy cheese layer on top.
Making It Your Own
A pinch of smoked paprika added to the breading mixture gives the crust a warm, subtle heat that nobody expects but everyone asks about later. You could also swap the Italian herbs for a teaspoon of curry powder if you are feeling adventurous, and the result is surprisingly delicious with a side of yogurt sauce.
Getting Ahead and Storing Leftovers
You can bread the chicken up to four hours before cooking and keep it uncovered on a tray in the refrigerator, which actually helps the coating dry and adhere better during frying.
- Leftovers keep well in an airtight container in the fridge for up to three days and reheat beautifully in a 180 degree C, 350 degree F, oven for about ten minutes.
- Avoid the microwave for reheating because steam will soften the crust and undo all your careful work.
- If you want to freeze cooked pieces, wrap each one individually in foil and they will hold their texture for up to two months.
 Save to Pinterest
 Keep this recipe in your back pocket for those evenings when you want something that feels special but demands almost no fuss, because golden, crunchy chicken is always the right answer.
Recipe Questions & Answers
- → How do I make the breadcrumb-Parmesan crust stick well?
-
Pound the breasts thin and dry them with paper towels. Dredge in flour, shake off excess, then dip in beaten egg before firmly pressing into the panko-Parmesan mix. Pressing the crumbs into the surface helps adhesion; chilling the coated breasts 10–15 minutes can further reduce slippage during frying.
- → Can I use chicken thighs or bone-in pieces instead?
-
Yes. Thighs will take a little longer and stay moist due to higher fat content. Bone-in pieces require more oven time—brown on the stovetop, then finish in the oven at a slightly lower temperature and cook until the thickest part reaches 75°C/165°F.
- → What are good gluten-free substitutions for the panko and flour?
-
Use certified gluten-free breadcrumbs or crushed gluten-free cornflakes/crumbled rice crackers in place of panko, and substitute rice flour or a gluten-free flour blend for the all-purpose flour. Double-check labels for hidden gluten in grated cheeses or seasoning blends.
- → Which oil and pan produce the best crust?
-
Use a neutral, high-smoke-point oil such as vegetable, canola, or light avocado oil. A heavy-bottomed skillet or cast-iron pan holds heat evenly and helps develop an even, golden crust during the quick pan-fry stage.
- → How can I tell when the chicken is done without a thermometer?
-
Slice into the thickest part: the meat should be opaque and the juices should run clear. While this visual check works, a quick-read thermometer is more reliable—target 75°C/165°F at the center.
- → Can I prepare the coated chicken ahead of time and reheat later?
-
Yes. After coating, refrigerate on a tray for up to 24 hours. For reheating, finish in a hot oven or toaster oven to revive the crispness; avoid microwaving, which will make the crust soggy. You can also pan-fry briefly before oven-finishing if starting from chilled.
