 Save to Pinterest
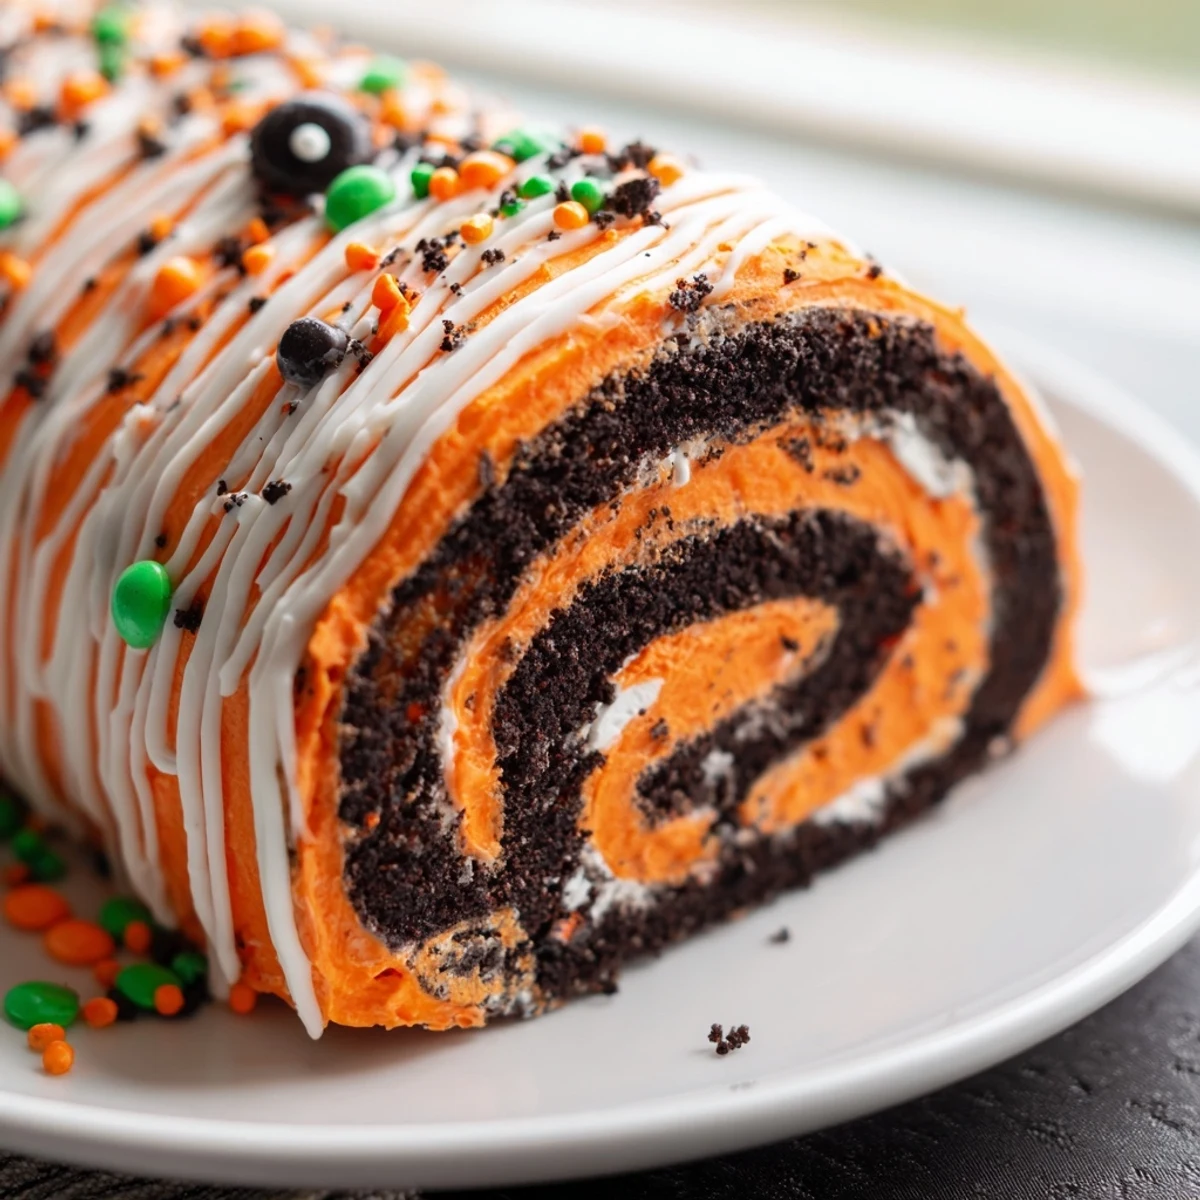
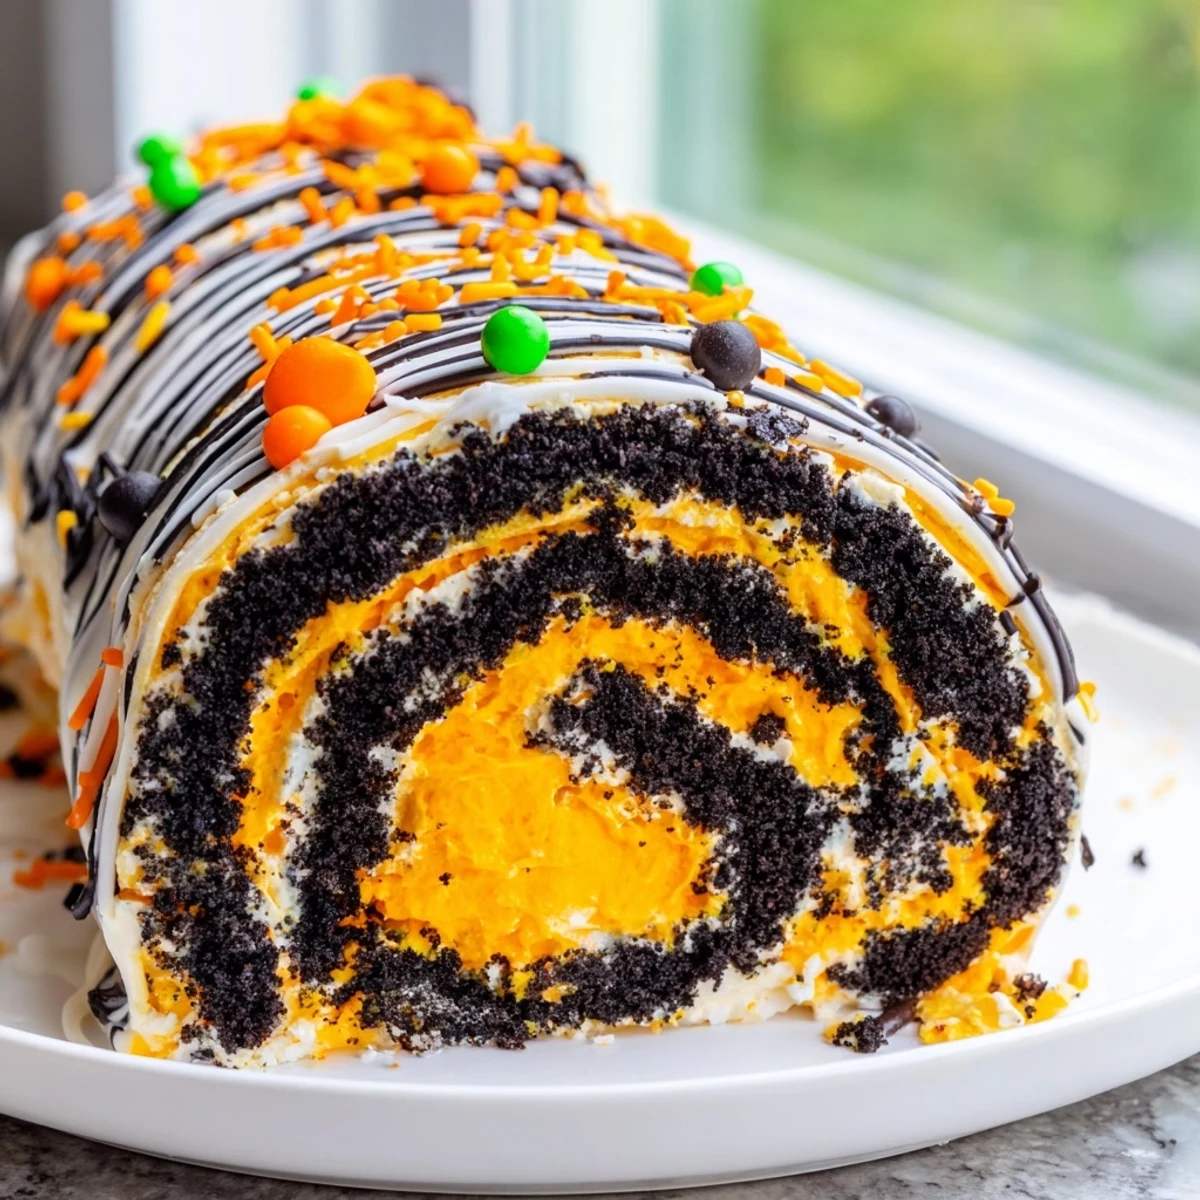
 Create a showstopping Halloween dessert with this no-bake Oreo roll. The cookies-and-cream base combines crushed Oreos with cream cheese and butter, rolled out and filled with colorful whipped cream. The entire log gets chilled until firm, then decorated with sprinkles, candy eyes, and chocolate drizzle for maximum festive impact.
Last October, my daughter declared we needed something "totally epic" for her class party. I was already exhausted from costume prep and had zero energy for baking. This no-bake Oreo roll saved the day—she actually gasped when she saw the spiral inside.
The year I made this, my kitchen counter looked like a glitter bomb had exploded. Orange sprinkles everywhere. But watching the kids faces when I sliced into that log? Worth every single speck of cleanup later.
Ingredients
- 36 Halloween Oreos: The seasonal ones have that perfect orange cream, but regular Oreos work if you add food coloring to the filling
- 1 cup powdered sugar: Sweetens the cookie base and helps bind everything together without making it too dense
- 6 tbsp unsalted butter, melted: Use melted butter, not softened—it helps the cookie mixture press into a smooth, workable dough
- 4 oz cream cheese, softened: Let it sit out for 30 minutes so it incorporates smoothly into the crushed cookies
- 1 cup heavy whipping cream: Cold straight from the fridge whips up faster and holds its shape better
- 1/4 cup powdered sugar: Just enough to sweeten the cream without masking the vanilla
- 1 tsp vanilla extract: Pure vanilla makes a noticeable difference in the filling flavor
- Orange or purple food coloring: Gel coloring works best—liquid can make the cream too soft
- Halloween sprinkles, candy eyes, melted chocolate: These transform the roll from dessert into showpiece
Instructions
- Prep your workspace:
- Line a large baking sheet with parchment paper—this will be your rolling surface and chilling station
- Make the cookie base:
- Pulse Oreos in a food processor until fine crumbs form, then mix with powdered sugar, melted butter, and cream cheese until sticky dough comes together
- Roll it out:
- Place Oreo mixture between two parchment sheets and roll to a 1/2 inch thick rectangle—peel back the top paper carefully to avoid sticking
- Whip the filling:
- Beat cold heavy cream with powdered sugar and vanilla until stiff peaks form, then gently fold in food coloring until fully incorporated
- Assemble the roll:
- Spread colored cream over the cookie base, leaving a 1 inch border on one long edge, then use the parchment to roll into a tight log starting from the filled edge
- Chill and decorate:
- Refrigerate for at least 1 hour until firm, then drizzle with melted chocolate and shower with sprinkles and candy eyes before slicing
 Save to Pinterest
 My niece asked if I could teach her to make it "like a real baker." We ended up with orange food coloring on our noses, flour on the ceiling, and the most lopsided roll ever tasted. Best Halloween memory yet.
Make Ahead Magic
This dessert actually improves after a night in the fridge. The cookies soften slightly, the flavors meld together, and the texture becomes creamier throughout. I often make it the evening before a party to free up time day-of.
Rolling Without Tears
The parchment paper is your best friend here. Use it to lift and guide the roll rather than touching the dough directly. If the roll cracks slightly, press gently from the outside to smooth it over—chilling will help it hold together perfectly.
Color Swapping Fun
Try alternating stripes of orange and purple filling for an especially dramatic spiral. Or go traditional with just white cream for a classic cookies and cream look that still tastes spectacular.
- Warm your knife under hot water between slices for cleaner cuts
- Let the roll sit at room temperature for 5 minutes before slicing if it is too firm
- Any cracks on the outside get covered by decorations anyway, so do not stress perfection
 Save to Pinterest
 There is something satisfying about a dessert that looks like you spent hours but actually came together in a flash. Happy haunting!
Recipe Questions & Answers
- → How long does the Oreo roll need to chill?
-
Refrigerate for at least 1 hour until firm. This ensures clean slicing and proper texture.
- → Can I make this ahead of time?
-
Yes! Prepare up to 24 hours in advance. Store covered in the refrigerator and decorate just before serving.
- → What if I can't find Halloween Oreos?
-
Use regular Oreos and add orange food coloring to the filling. The decorations will provide the festive Halloween touch.
- → How do I get clean slices?
-
Use a sharp knife and wipe it clean between cuts. Chilling thoroughly is essential for neat, even slices.
- → Can I freeze this dessert?
-
Yes, freeze undecorated for up to 1 month. Thaw in refrigerator overnight, then add decorations before serving.
