 Save to Pinterest
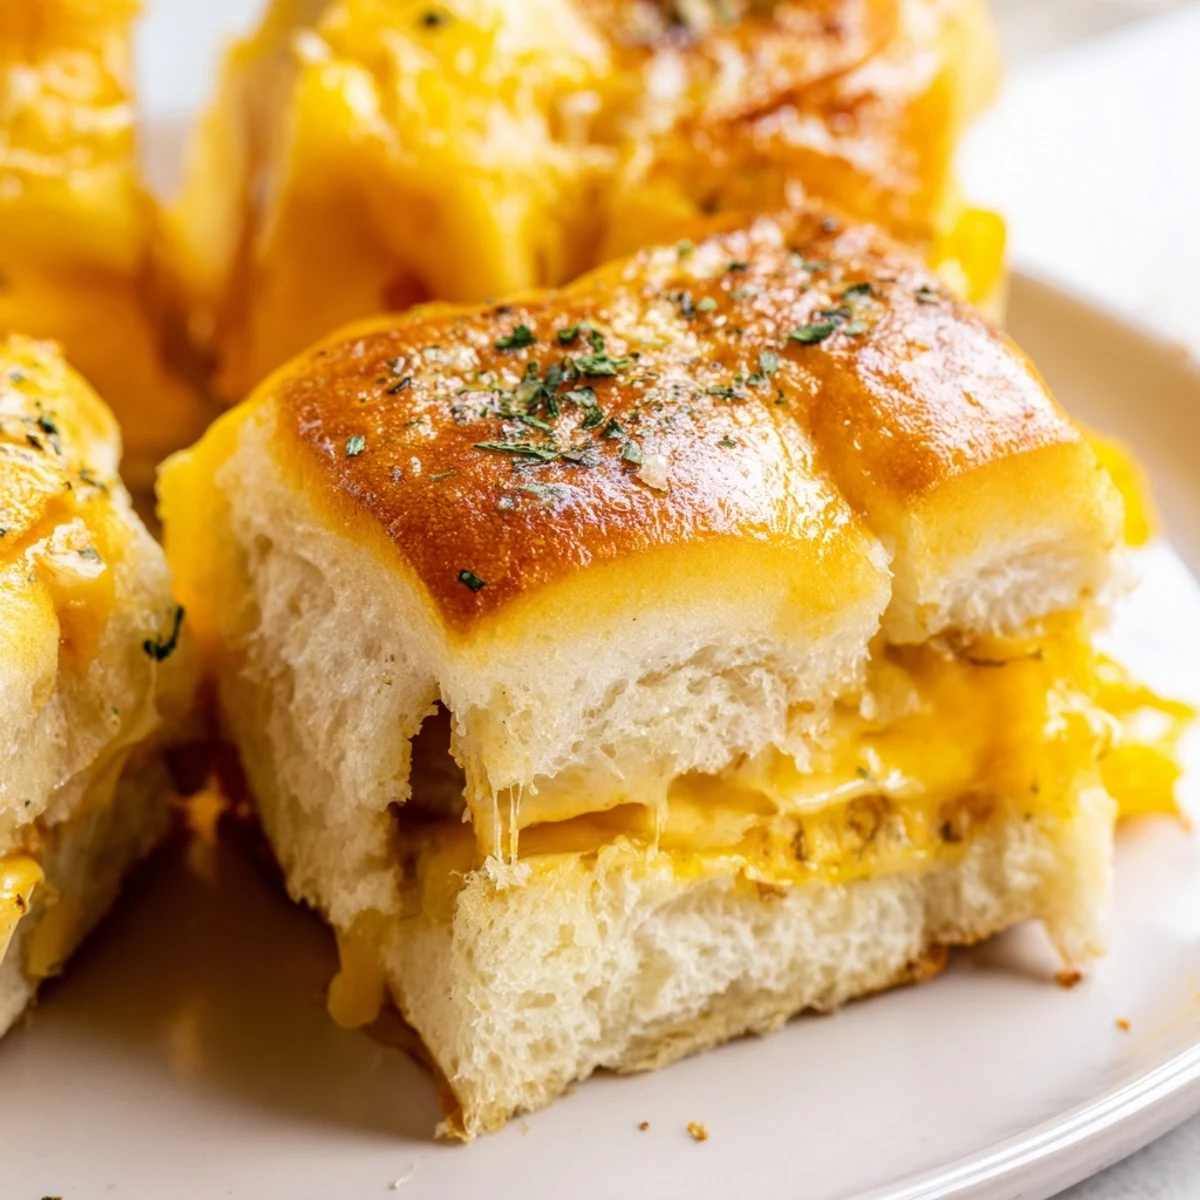
 These sweet and savory Hawaiian roll sliders feature layers of sharp cheddar cheese melted between buttery, golden-brown sweet rolls. Perfect for gatherings, they bake in just 15 minutes and serve 12 people. The natural sweetness of Hawaiian rolls pairs beautifully with savory cheddar, creating that irresistible sweet-salty combination everyone loves. Brush with melted butter and season with garlic powder for extra flavor, or customize with bacon, ham, or different cheeses.
The first time I made these for a Super Bowl party, my friend Sarah stood by the counter watching me assemble the entire block of rolls at once. She looked skeptical until they came out of the oven golden and bubbling, then proceeded to eat four before anyone else even walked into the kitchen.
My daughter actually asked if we could have these instead of birthday cake last year. I laughed and made both, but watching seven-year-olds race back to the appetizer table while the cake sat there mostly untouched told me everything I needed to know about these little sandwiches.
Ingredients
- Hawaiian sweet rolls: That subtle sweetness is what makes these addictive so please resist the urge to substitute plain dinner rolls.
- Cheddar cheese: Slice it yourself if possible because the pre-sliced stuff sometimes melts weirdly and you want that gorgeous cheese pull.
- Unsalted butter: Melted brushed on top creates that gorgeous golden finish that makes people assume you spent way more effort than you actually did.
- Dijon mustard: Just a subtle kick that cuts through the richness and makes grown-ups keep reaching for more.
- Garlic powder and parsley: Totally optional but they make these look like they came from a fancy bakery window.
Instructions
- Get your oven ready:
- Preheat to 350°F and line that baking sheet with parchment because trust me, cheese will escape and you do not want to clean that off your pan later.
- Slice smart:
- Keep the rolls connected and slice through the entire horizontal block at once creating one massive top and bottom layer instead of separating them.
- The secret layer:
- Whisk mustard and mayo together if you are using them, then spread both cut sides like you are making a giant sandwich.
- Cheese it up:
- Pile your cheese slices over the bottom half, overlap slightly if needed, then nestle that top half back on like you are tucking it in.
- Butter bath:
- Brush melted butter generously over the tops and hit them with garlic powder and parsley while the butter is still wet so everything sticks.
- The foil trick:
- Bake covered for 10 minutes then uncover for the last 5 so the cheese gets completely melty without burning the tops before the insides are ready.
- Separate and serve:
- Let them rest just a couple minutes so the cheese sets slightly, then cut apart and watch them disappear faster than you thought possible.
 Save to Pinterest
 Now every time my kids have friends over after school, I hear the question in that hopeful voice. These little sliders have turned into the thing that makes my house the one where everyone wants to hang out, and honestly that is the best feeling.
Make Them Your Own
The beauty here is that the Hawaiian roll and cheese foundation works with practically anything you want to add. My husband loves crumbled cooked bacon inside, while my sister swears by thin tomato slices when they are in season. Think of these as a canvas for whatever makes your people happy.
The Party Planning Secret
I have started making these ahead of time, stopping right before the baking step, then wrapping the whole tray tightly and keeping it in the fridge. When guests arrive, just pop them in the oven and you have freshly baked, amazing-smelling appetizers without missing a single conversation.
Serving Ideas That Actually Work
Pair these with a simple tomato soup or a crisp green salad if you want to turn them into dinner. For parties, arrange them on a wooden board with some pickles and maybe some fruit to cut the richness.
- Make double the recipe if you are feeding more than four people because they go fast.
- Leftovers actually reheat surprisingly well in the toaster oven for about 3 minutes.
- Consider setting up a toppings bar and letting people customize their own halves before baking.
 Save to Pinterest
 Hope these become your go-to for everything from Tuesday night dinner to your next big gathering.
Recipe Questions & Answers
- → Can I make these ahead of time?
-
Yes, assemble the sliders up to 24 hours in advance and refrigerate. Brush with butter just before baking. They may need a few extra minutes if baked cold from the refrigerator.
- → What other cheeses work well?
-
Mozzarella creates amazing cheese pulls, Swiss adds nutty flavor, pepper jack brings gentle heat, or try a blend of multiple cheeses. Provolone and American also melt beautifully.
- → How do I store leftovers?
-
Store in an airtight container in the refrigerator for up to 3 days. Reheat in a 350°F oven for 5-8 minutes until warmed through and cheese is melty again.
- → Can I freeze these?
-
Yes, freeze baked and cooled sliders in a freezer-safe container for up to 2 months. Thaw overnight in the refrigerator, then reheat in the oven until hot.
- → What should I serve with these?
-
Pair with warm tomato soup for dunking, a crisp green salad, or serve as part of an appetizer spread with other finger foods. They're also great alongside chili or soup.
