 Save to Pinterest
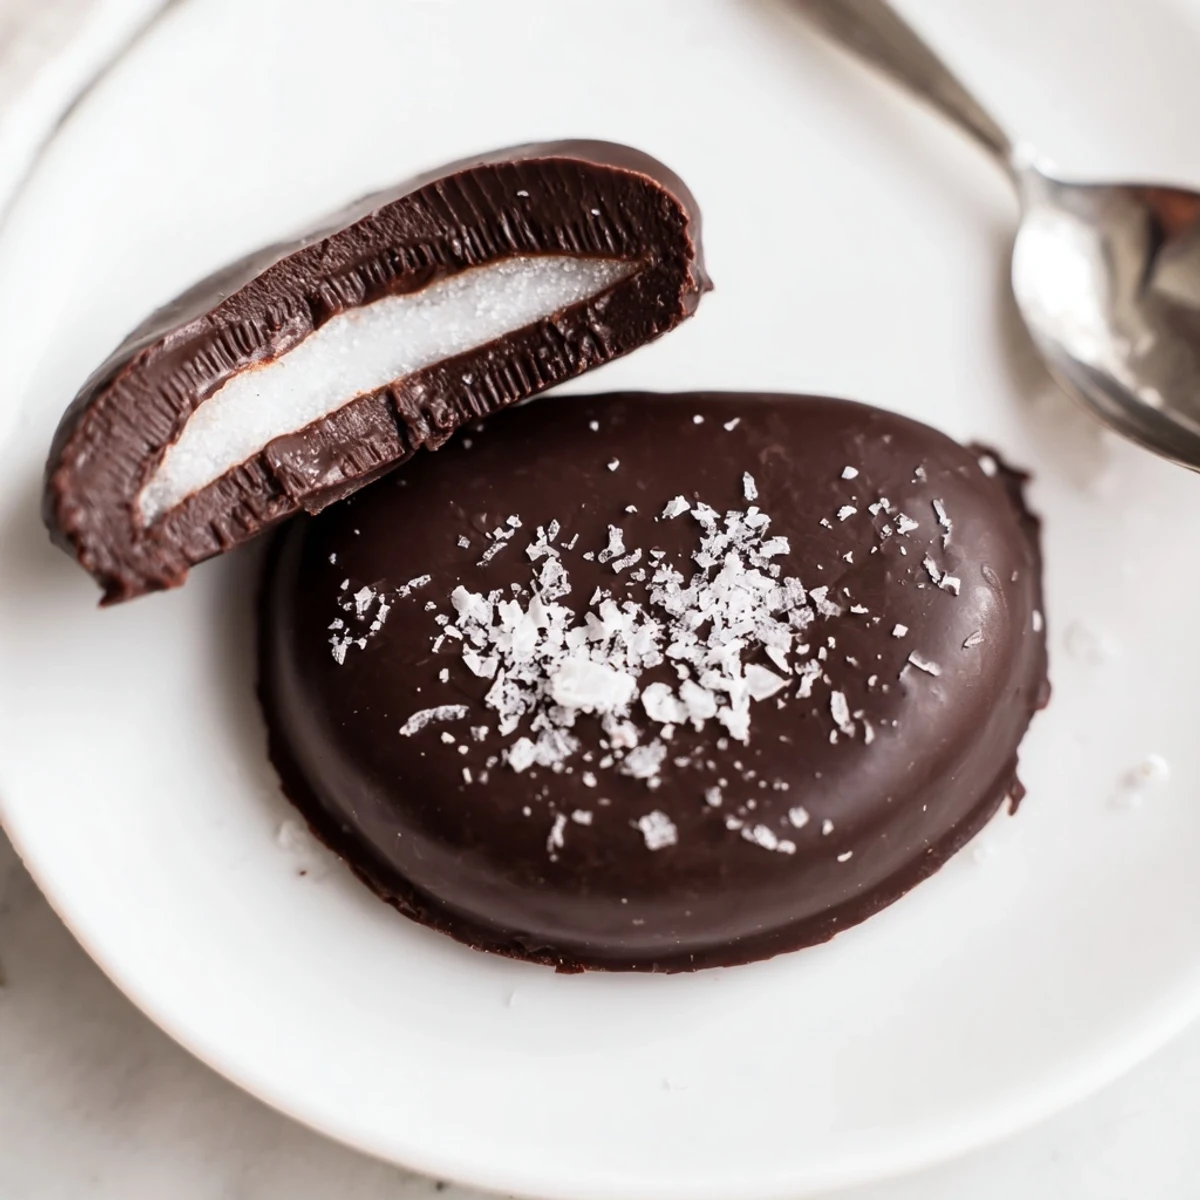
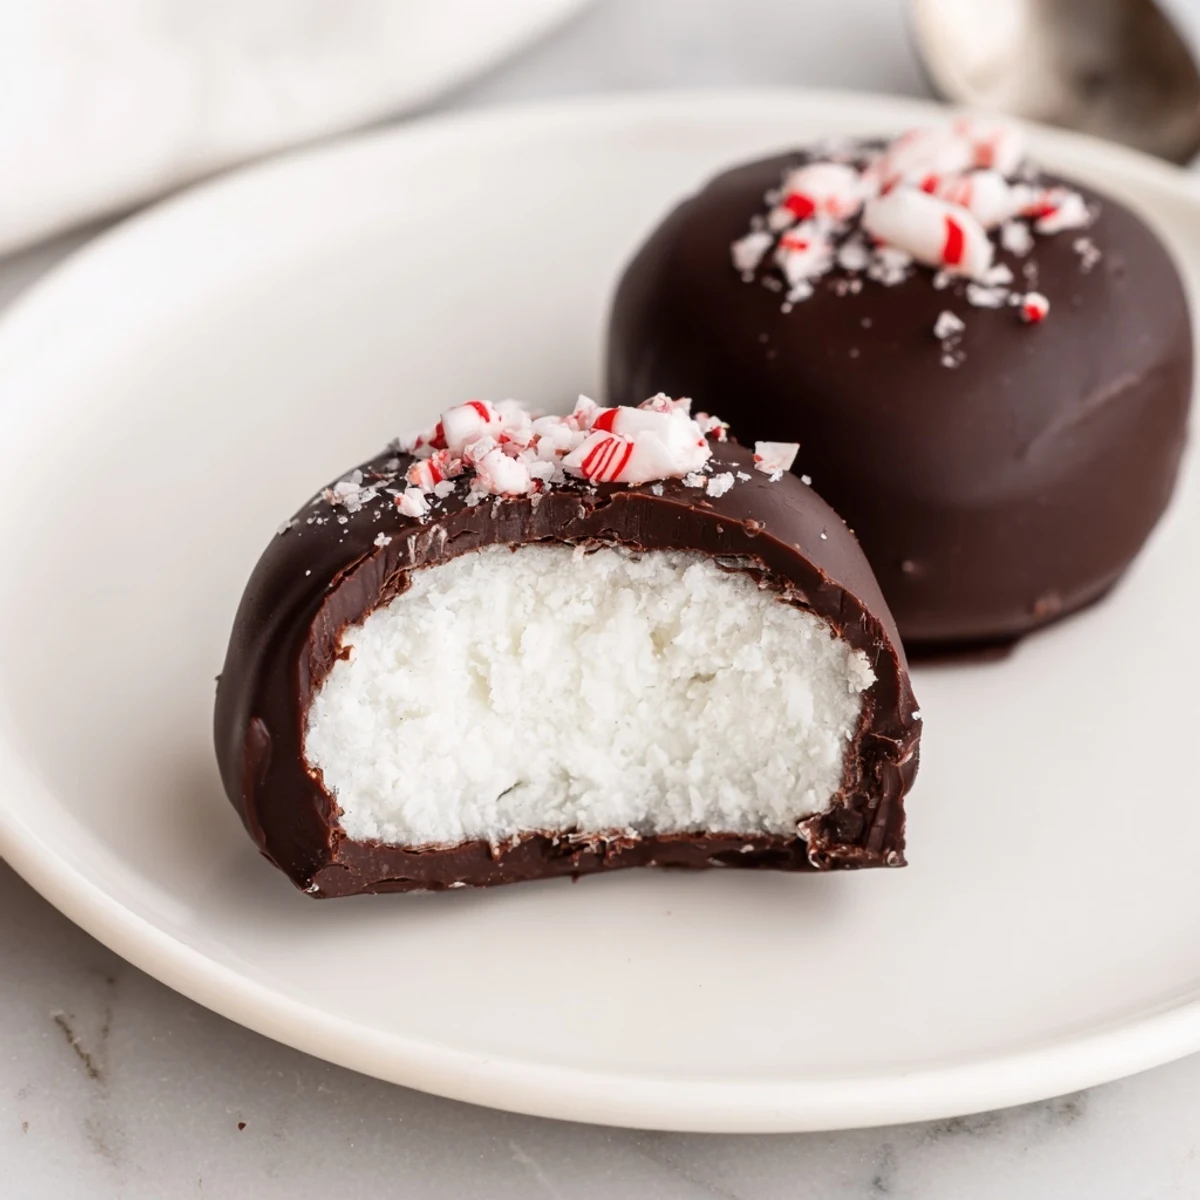
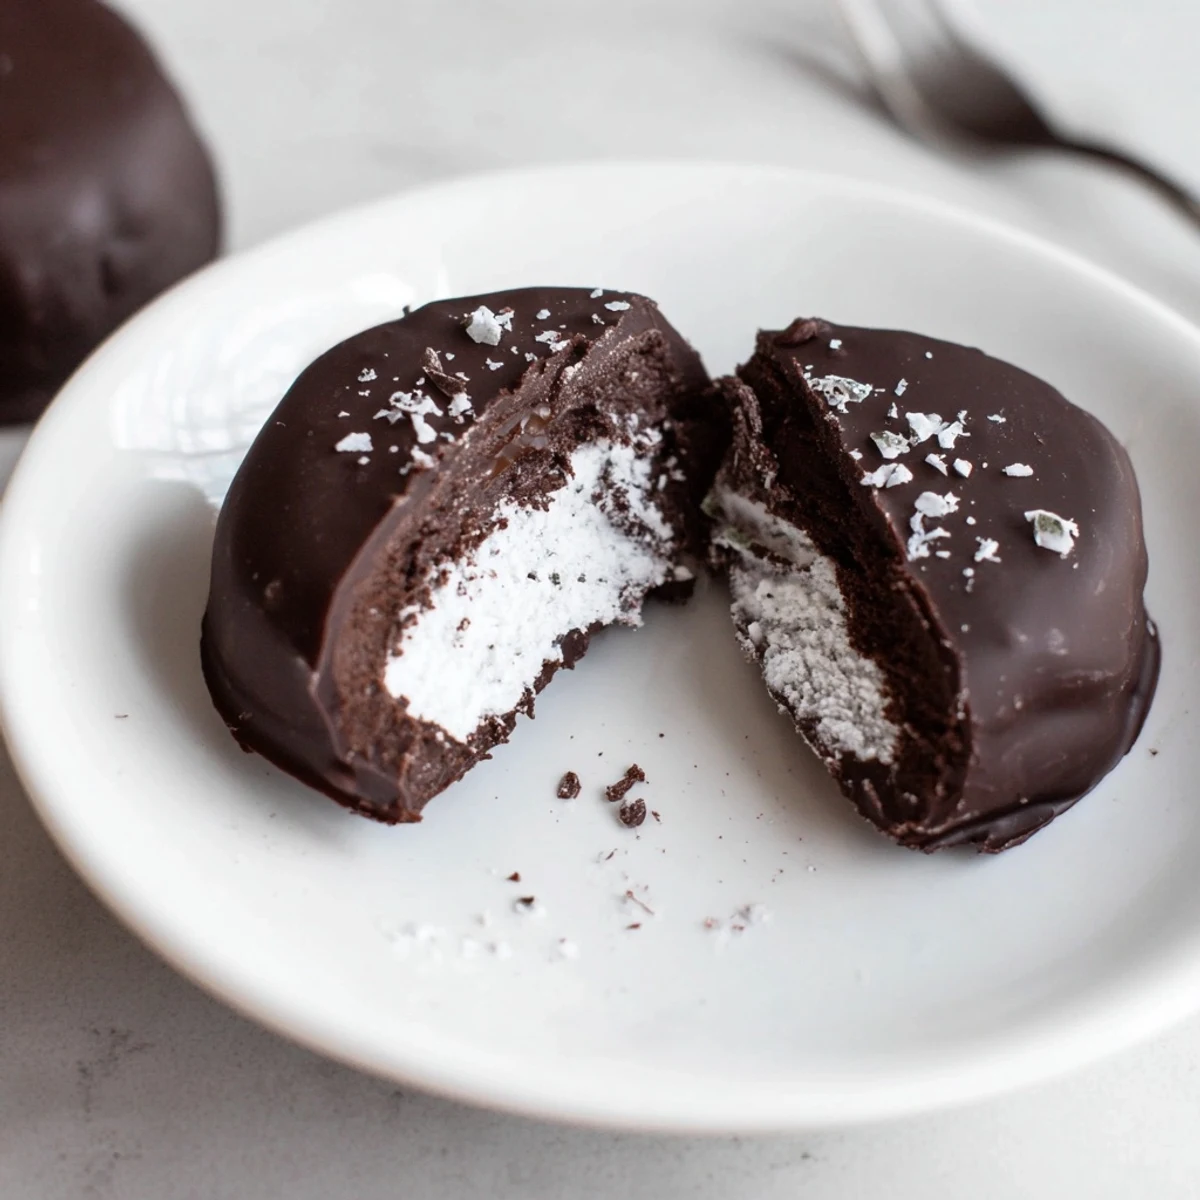
 In about an hour, make a smooth peppermint dough from powdered sugar, butter, peppermint extract and cream, shape into discs, freeze until firm, then enrobe in melted dark chocolate. Yield: ~24 patties. Tips: add crushed candy or flaky salt before chocolate sets; swap dairy-free butter and coconut cream for a vegan version. Store chilled up to two weeks.
The first time I made homemade peppermint patties, a crisp December wind rattled the windows while I worked, filling my small kitchen with a sharp, invigorating aroma. There was something undeniably cheering about the way cool mint tangled with the scent of melting chocolate. As I spooned pale filling onto parchment, I caught myself humming absentmindedly—proof that some recipes just work a sort of quiet magic. Forget the store-bought kind: making these yourself is a little celebration in the middle of ordinary life.
I brought a batch of peppermint patties to a movie night at a friend’s place, expecting maybe a polite nibble or two. Instead, they vanished between popcorn refills, leaving a faint chocolatey scent and a conspiratorial grin on everyone’s faces—apparently, homemade beats any theater candy.
Ingredients
- Powdered Sugar: Sift it well so your peppermint filling turns out silky and lump-free—trust me, you don’t want gritty mints.
- Unsalted Butter: Soft butter blends into the sugar for that rich, creamy texture inside each patty.
- Peppermint Extract: Use pure extract for the cleanest mint flavor, and remember: a few drops go a long way.
- Heavy Cream: This is the secret to a dough that’s easy to shape but not sticky—add slowly so you hit the sweet spot.
- Salt: Just a pinch wakes up all the flavors and keeps things balanced, not too sweet.
- Dark Chocolate: A higher cocoa percentage brings out a deep, grown-up richness—chop it so it melts smoothly.
- Coconut Oil (optional): I learned the hard way that a splash makes the chocolate silky and glossy, less likely to crack.
Instructions
- Make the Minty Dough:
- In a mixing bowl, cream together powdered sugar, soft butter, peppermint extract, heavy cream, and salt until it comes together in a smooth, pliable ball. If it sticks to your hands, sprinkle in a bit more powdered sugar.
- Shape and Chill:
- Take small scoops of the dough, roll them, and press into discs about a quarter inch thick on parchment—expect to get a finger or two minty. Slide the tray into the freezer for about 25 minutes until the patties are just firm.
- Prepare the Chocolate Coating:
- Gently melt the dark chocolate (with coconut oil if using) in a heatproof bowl over simmering water, stirring until glossy and smooth. The aroma at this step is outrageous.
- Dip the Patties:
- Drop each frozen mint disc into the melted chocolate and use a fork to lift them out, letting extra chocolate drip before setting them back on the paper. Work quickly, or the centers will soften in your hands.
- Chill and Finish:
- Return the chocolate-coated patties to the fridge for at least 15 minutes so everything sets up and snaps cleanly when you bite in.
 Save to Pinterest
 There’s a certain thrill in watching a tray of glossy, just-set patties disappear before you even get them into a tin—once, my neighbor popped by for coffee, and we found ourselves sharing stories and peppermint patties until only crumbs were left.
Making Peppermint Patties for the Holidays
During winter, I like to sprinkle a little crushed peppermint candy or flaky salt onto the chocolate before it hardens. It’s a small touch that adds crunch and makes them sparkle on the cookie tray—and it always gets a smile at family gatherings.
Finding the Right Balance of Mint
Not everyone loves the same level of mint, so I sometimes start with a little less extract, then knead in more if I want a zingier bite. If you go too strong, don’t panic: a quick dusting of extra sugar on your hands can mellow things out as you shape the filling.
Troubleshooting and Storing Your Patties
If any patties crack or aren’t picture-perfect, don’t fret—they’re still delicious, and honestly, a little rustic charm just says homemade. Store the finished sweets in a lidded container, and tuck in parchment between layers to keep them separate.
- If you want to make them vegan, sub in coconut cream and dairy-free butter—the texture stays dreamy.
- A quick chill before serving triples the refreshing factor.
- For gifts, line a tin with parchment and stack them gently so the chocolate stays shiny and smudge-free.
 Save to Pinterest
 Light, cool peppermint and bittersweet chocolate are a little luxury worth making at home. These patties always seem to bring people together—even if it’s just for the last one on the plate.
Recipe Questions & Answers
- → How do I prevent the filling from being too sticky?
-
Beat powdered sugar with the butter and cream until smooth, then add more powdered sugar a tablespoon at a time until the mixture is pliable but not sticky. Chilling the discs before dipping helps them hold their shape and reduces stickiness.
- → What type of chocolate works best for coating?
-
Use dark chocolate 60–70% cocoa for a good balance of bitterness and sweetness. Melt gently over simmering water and stir in a little coconut oil if you want a glossier, smoother coating.
- → How can I make a dairy-free version?
-
Substitute dairy-free butter and coconut cream for the filling, and choose a dairy-free dark chocolate for coating. These swaps preserve texture and mint flavor while keeping the patties plant-based.
- → Can I freeze the patties?
-
Freeze the chilled patties in a single layer on parchment, then transfer to an airtight container. Thaw in the refrigerator briefly before serving to avoid condensation on the chocolate.
- → Any tips for a festive finish?
-
Before the chocolate sets, sprinkle crushed peppermint candy, chopped candy canes, or flaky sea salt for color and texture. Work in small batches so the topping adheres before hardening.
- → How long do they keep in storage?
-
Store in an airtight container in the refrigerator for up to two weeks. For best texture, let patties sit at cool room temperature a few minutes before serving.
