 Save to Pinterest
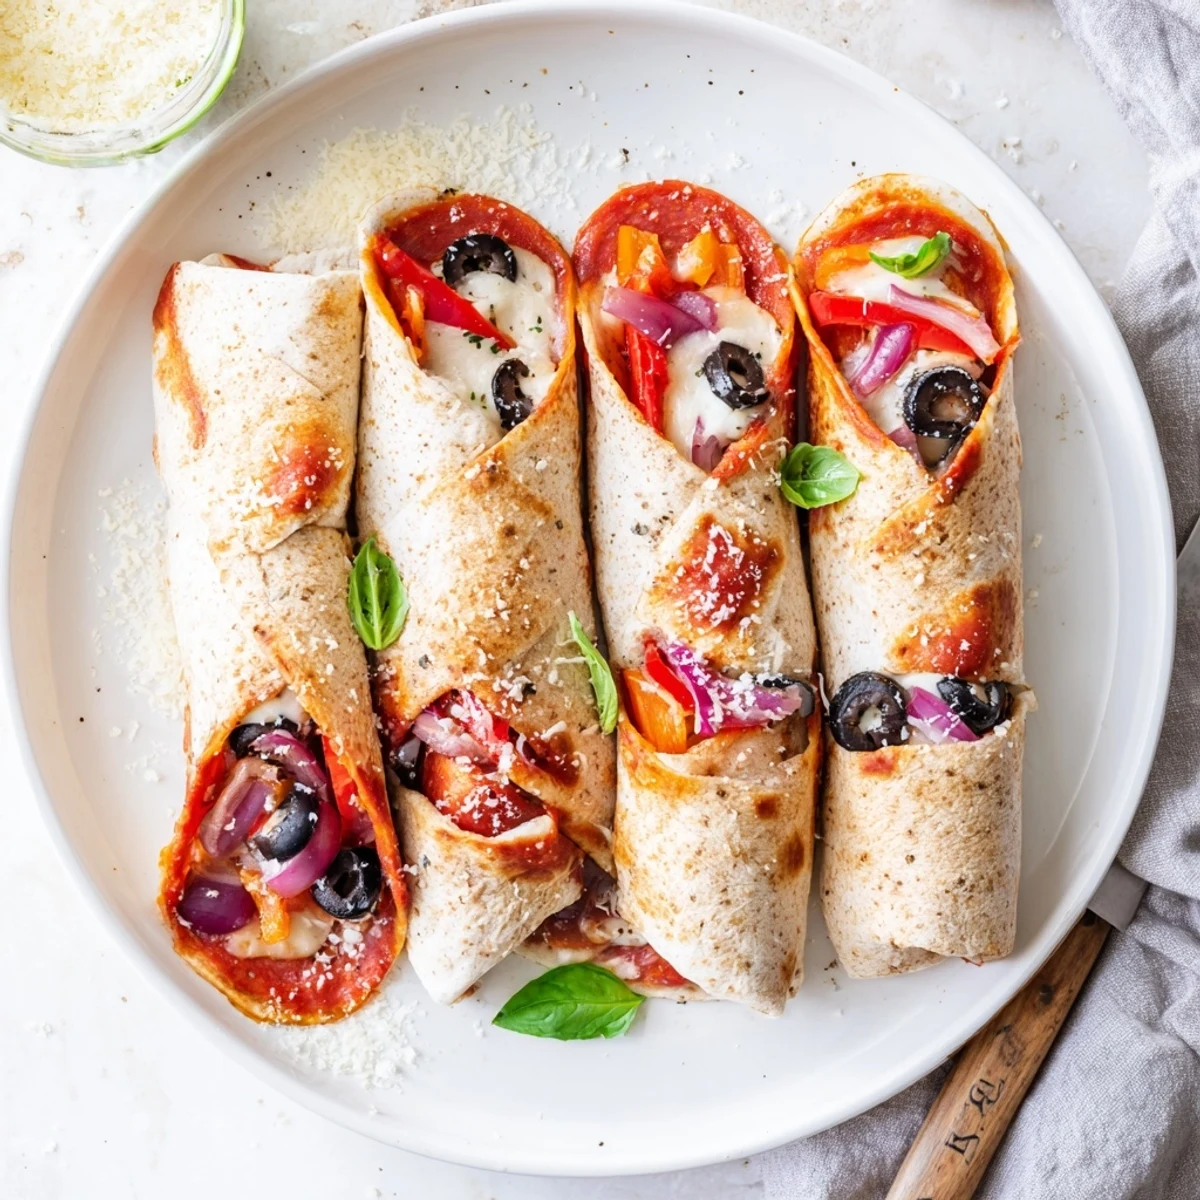
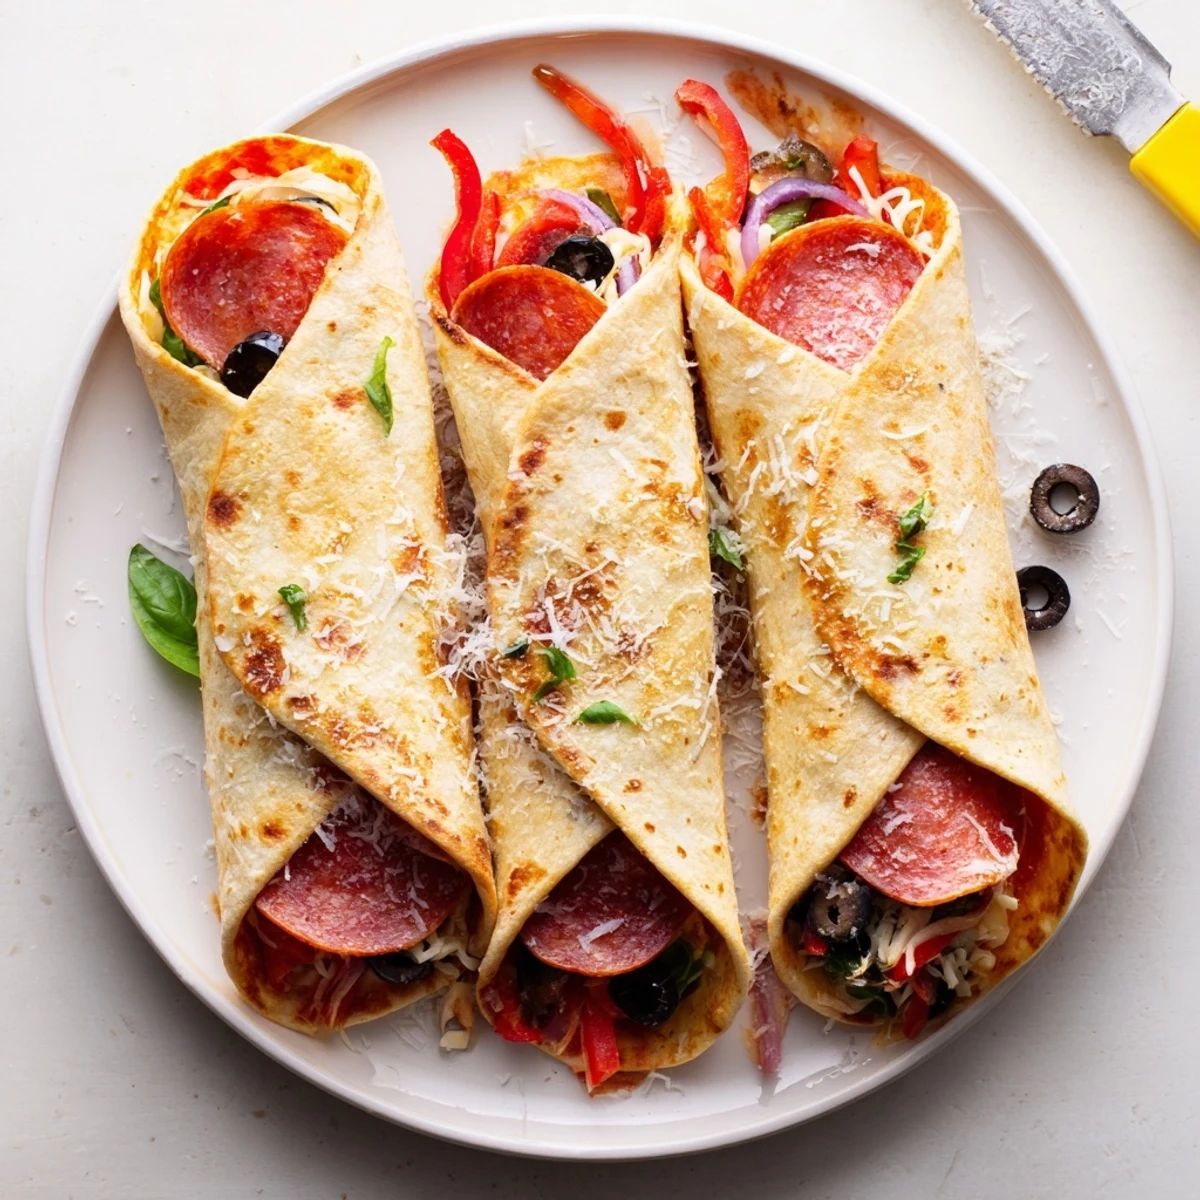
 These handheld delights combine everything you love about pizza with the convenience of a burrito. Flour tortillas get loaded with classic pizza toppings—zesty sauce, melted mozzarella, pepperoni or mushrooms, crisp bell peppers, olives, and aromatic seasonings—then rolled up tight and cooked until perfectly golden and crunchy.
The oven method delivers evenly crisped burritos in about 20 minutes, while the air fryer creates an extra-crispy exterior in just 10 minutes. Either way, you end up with warm, cheesy, portable comfort food that's perfect for weeknight dinners, game day snacks, or lunch boxes.
Customize with your favorite pizza toppings, make it vegetarian with mushrooms instead of pepperoni, or add cooked sausage for extra protein. Serve with extra sauce for dipping and enjoy the satisfying crunch of that golden tortilla shell.
The first time I made pizza burritos was purely by accident on a Tuesday night when I was too tired to make actual pizza dough but craving those flavors. My teenage daughter walked in, took one look at the tortillas wrapped around pepperoni and cheese, and declared them better than delivery. Now they have become our go-to dinner when we want something fun and comforting.
Last summer during a neighborhood potluck, I brought a platter of these bubbling from the oven. They disappeared so fast that three moms asked me for the recipe right there on the spot. Something about the familiar pizza flavors wrapped up in a handheld format just makes people happy.
Ingredients
- Large flour tortillas: These need to be pliable enough to roll without tearing but sturdy enough to hold all the fillings
- Pizza sauce: Spread it thinly in the center only so the tortilla does not get soggy in the middle
- Shredded mozzarella cheese: Freshly shredded melts better than pre-shredded which has anti-caking agents
- Pepperoni or mushrooms: The pepperoni gets delightfully crisp while mushrooms add a meaty texture for vegetarians
- Bell peppers and red onion: These add fresh crunch and sweetness that balances the rich cheese
- Black olives: They provide a salty bite that reminds me of classic pizza topping combinations
- Oregano and garlic powder: These dried herbs bloom in the oven giving that authentic pizza aroma
- Olive oil spray: This is the secret to getting restaurant-style golden crispy exteriors
- Optional finishing touches: Fresh basil and grated Parmesan elevate them from dinner to something special
Instructions
- Preheat and prepare:
- Get your oven to 400°F or air fryer to 375°F while you clear a large workspace for assembling
- Layer the sauce and cheese:
- Spoon pizza sauce in the center of each tortilla leaving at least two inches clear on all edges for folding
- Add your favorite toppings:
- Pile on the mozzarella pepperoni vegetables and seasonings but do not overstuff or they will not close properly
- Roll them up tight:
- Fold the sides in first then roll from the bottom up like a burrito tucking everything in snugly
- Brush with olive oil:
- This step is crucial for that golden crunch so coat the outside evenly without soaking the tortilla
- Choose your cooking method:
- Place seam side down on parchment for the oven or directly in the air fryer basket making sure they do not touch
- Wait for the golden crunch:
- Bake for 18-20 minutes or air fry 8-10 minutes flipping halfway until they sound hollow when tapped
 Save to Pinterest
 These have saved us on countless busy weeknights when ordering pizza feels too expensive but cooking a full meal feels too exhausting. The way the cheese pulls apart when you bite into them still feels like a small victory every single time.
Oven Versus Air Fryer
I have tested both methods extensively and they each have their merits. The oven gives you that uniform golden color and lets you make all four at once which is perfect for family dinners. The air fryer creates an almost fried-chicken level of crunch on the outside but you will need to cook them in batches. Honestly whichever appliance you have available will work beautifully.
Make Ahead Magic
You can assemble these burritos up to 24 hours before cooking and store them tightly wrapped in the refrigerator. The tortilla actually absorbs some of the seasoning during this time which I have found makes them even more flavorful. Just add an extra 2-3 minutes to the cooking time if they are cold from the fridge.
Serving Suggestions
We always set out small bowls of warm pizza sauce and cool ranch for dipping because everyone has their preference. A simple green salad with vinaigrette cuts through the richness nicely. My kids like them with a side of garlic knots but honestly they are satisfying enough to stand alone.
- Try marinating artichoke hearts in olive oil and adding them for a gourmet version
- A drizzle of hot honey over the finished burritos creates the most amazing sweet and spicy contrast
- Leftovers reheat surprisingly well in a toaster oven at 350°F for about 10 minutes
 Save to Pinterest
 There is something deeply satisfying about taking two comfort foods and mashing them together into something entirely new and wonderful. I hope these become a regular rotation in your dinner lineup too.
Recipe Questions & Answers
- → Can I make these ahead of time?
-
Yes, assemble the burritos and refrigerate up to 24 hours before cooking. Add 2-3 minutes to cooking time if baking from cold.
- → What's the best way to reheat leftovers?
-
Reheat in a 350°F oven for 10 minutes or air fry at 350°F for 5 minutes to restore crispiness. Microwave makes them soggy.
- → Can I freeze these burritos?
-
Absolutely. Freeze individually wrapped before cooking. Thaw overnight in refrigerator, then bake or air fry as directed.
- → How do I prevent tortillas from tearing?
-
Warm tortillas for 20-30 seconds in microwave before filling. Don't overfill, and keep ingredients away from edges.
- → What other toppings work well?
-
Try cooked Italian sausage, bacon, mushrooms, spinach, jalapeños, pineapple, or different cheese blends like cheddar and provolone.
- → Are these suitable for meal prep?
-
Perfect for meal prep. Make a batch, cool completely, and store in refrigerator for 3-4 days. Reheat for crispy results.
